Gifts to Make: Square Mitts
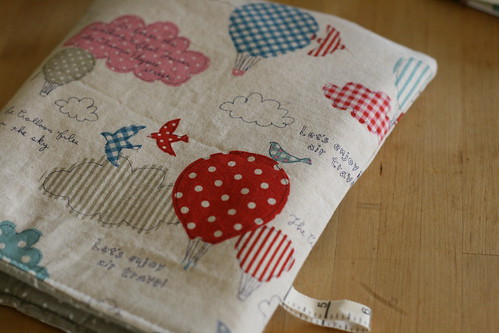
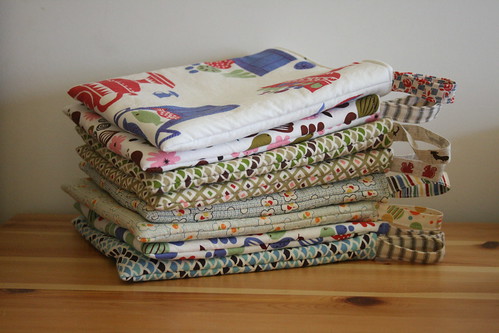
(The top photo is of one I made last week out of some mid-weight Kokka we have at the store. The bottom photo is of last year's pile. -- Melissa)
This is one of those last-minute-rushing-out-the-door sorts of gifts that you might find yourself needing on your way to your next get together. Square hot pad mitts fit nearly everyone, double as trivets, are easy to sew, and work in a pinch as a cover for a french press. There are a few projects that I like to keep in my back pocket and this is one that is conditional on always having a little Insul-Bright hanging around (so make sure you pick some up next time you're in). Insul-Bright is a fantastic needle punched insulating material that is as easy to work with as quilt batting. It's relatively inexpensive and protects your hands from the heat of a cookie sheet coming straight out of the oven. This man version from Amy will always be my favourite-- and look! It's from 2005. That's practically ancient of days in internet history.
I'm sure that you can probably figure out how to make it by looking at the picture, but just in case...
You only need (and all the measurements can be adjusted to suit, as long as they all match):
- 2 pieces of interior fabric 8 1/2" by 10"
- 2 pieces of interior fabric 8 1/2" by 10"
- 2 pieces of Insul-Bright 8 1/2" by 10"
- 2 pieces of plain flannel/cotton batting (you guessed it) 8 1/2" by 10"
- a length of bias or twill tape about 4" long for a hanging loop
You're sewing together two separate layered rectangles in this way:
- Place one piece of exterior fabric right side down. Put your piece of flannel on top. And then your piece of Insul-Bright. Repeat with other piece of exterior fabric. Take the two stacks, place them right sides together, sandwiching your twill tape loop on the bottom of one of the long sides.
- Sew through the whole stack starting at a long side and leaving an entire short side open. Backstitch at either end to secure. Trim your seam allowance.
- Place the interior rectangles, right side together and sew both long sides, leaving both short sides open. You may want to increase your seam allowance on the interior fabric to account for the bulkiness of the sandwiched exterior.
- Turn the interior right side out and the exterior wrong side out. Put the interior inside the exterior and line up the raw edges. Stitch around entire edge and turn everything the right way around.
- You'll still have that open interior side, so once you have it in properly, pull it out, pinch the raw edges together and stitch it up. Normally I would say handstitch the opening, using a slipstitch, but this is a utilitarian kind of thing that's going to get a lot of wash and wear.
- You're done! You can top stitch (very slowly, it's going to be bulky at the seams) the bottom edge if you like.
This is the kind of thing that you could whip out a whole stack of for just-in-case kinds of gifts. Better yet, make some for yourself.