Getting Started: June Picnic Throw
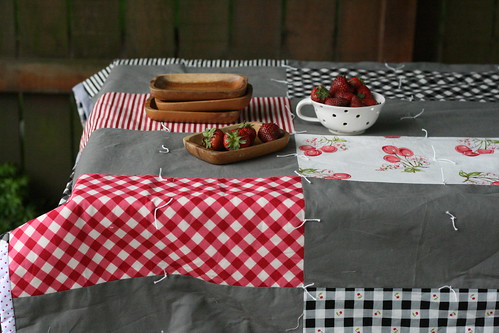
In keeping with our series of project ideas for beginners, I give you the June Picnic Throw. It's a handy blanket measuring approximately 52" by 72", which is big enough to cover a small to medium picnic table or wrap up in at an outdoor concert. I love traditional gingham check for picnics-- especially red and white. This is a variation on that theme that is yelling for summer to come on over.
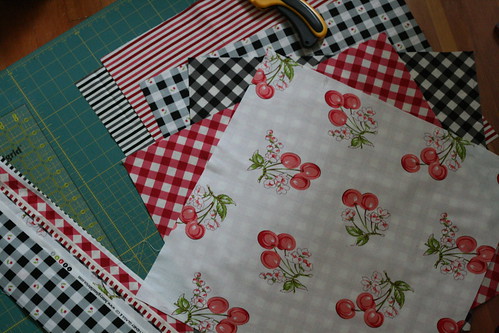
We're going to use:
- 6 piece fat quarter pack. These prints all come from Henry Glass and Kaufman.
- 2 yards of coordinating solids (the extra will be for binding)
- 2 1/8 yard 54" or wider fabric. You can also piece the back from two 1 1/2 yard 44" inch or wider pieces of fabric.
- You can choose whether or not you'd like to interline the throw with quilt batting (I did) or leave it on the thin side, which is just as nice for summer.
- a skein of pearl cotton and a sharp needle with a large head. A curved upholstery need is handy but not necessary.
First off, cut your fat quarters into 18" square and then in half again. You'll now have 12 rectangles measure 9" by 18". Keep the scraps. We'll use them to piece the binding. Now cut 12 rectangles 9" by 18" out of the coordinating solid.
Placing right sides together, sew one print and one solid down the longest side. Repeat until they are all done. Press open all seams.
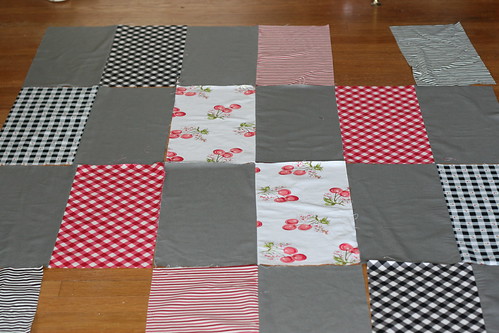
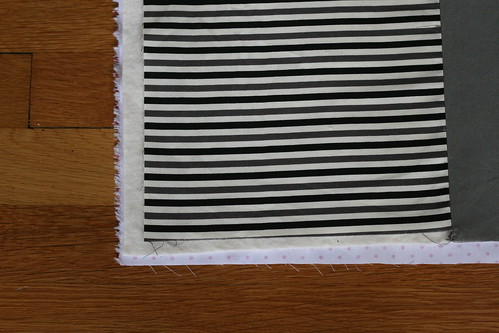
Lay out your blocks. These blocks will now by 17 1/2" by 18" long and you can leave them this way, or you can trim them into 17 1/2" square blocks. If you trim them, you can lay them out by alternating their direction to create a more interesting pattern. Or! Keep them as rectangles (I did) and put them together how you would like them. At this point, I stand back and squint at the finished top from all angles. By squinting, you'll be able to see color and value distribution.
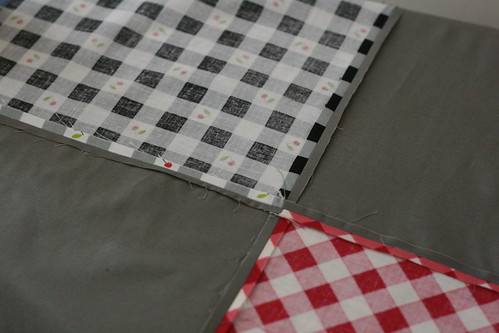
Stack them in order and move them to your sewing machine. For this design, we want our points to match, and so, we're going to sew them together "end to end". Place a straight pin through both seam allowances, matching the points exactly. Remove the pin just as you come to sew over it.
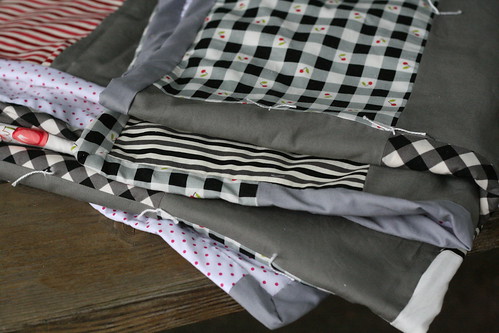
When the three rows are finished, piece them one to the other using the same method. Press all of your seams together.
Make a quilt sandwich! We went over this in our baby quilt and even though this throw is bigger, this sandwich is going to be even easier because we're going to tie our blanket instead of sewing it together. Still, make sure all your layers have been pressed and smoothed and pinned together with safety pins ever 6" or so.
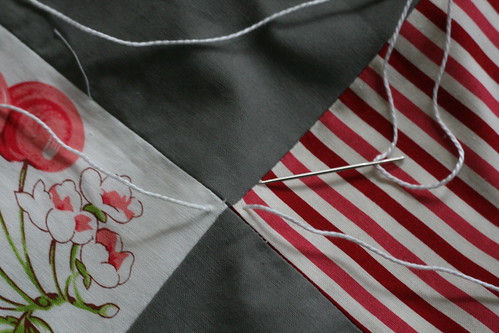
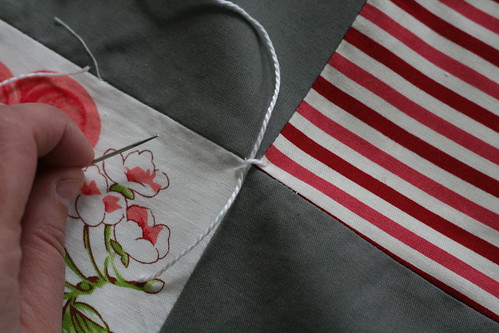
Why tie? Well, for a quilt this size, I sometimes have a hard time wrestling it through my machine. I can always hand quilt it, but I don't want to worry about my stitches getting walked on or rolled in the dirt at the park. Tying is fast and keeps things where they should be. To tie your quilt, cut a yard of thread and put it through your needle. Start in the middle of your blanket and thread it through where the points come together. Take care to make sure that you're going through all the layers. Leave a 2" tail on either end and snip. Move on to the next point. Once you have our points tacked, knot your tails together. Keep tacking until you have knots every 4" or so (full disclosure-- mine are too far apart! I knowingly did this to get the quilt finished. Now I'm going back and continue sewing ties in between the ones that are already there which should space them out nearly perfectly).
We are almost done. All that's left is to bind it up-- use your scraps and any leftover backing fabric after you've trimmed your blanket and sew a continuous strip of fabric at least 260" long (it sounds daunting, but once you get going you'll have a strip in no time). Refer back to part three of our baby quilt for links and suggestions on this one. Once you've bound one quilt, you'll quickly master doing it again!
This is such a fantastic gift for a Spring or Summer wedding. It's quick, handmade and filled with promise about all the fun the lucky couple is about to have.