Make a Rope Bowl
by Cameron
There's a craze sweeping the nation. A rope bowl craze. Maybe you know someone who's been afflicted by the madness. I was shocked to find myself caught up in the excitement, wandering grocery stores and hardware stores, craft stores and pharmacies looking for clothesline. You'd think it be with laundry supplies, right? But it never is. Anyway... search no more fellow and future rope bowl fiends! Your friendly neighborhood fabric boutique is now carrying cotton clothesline.
Once you make a - shockingly easy - rope bowl, it's easy to see way they've become so popular. They're so simple to make. There's almost nothing to prepare and no fiddly finishing. Just wind up a ball of rope and sew it together.
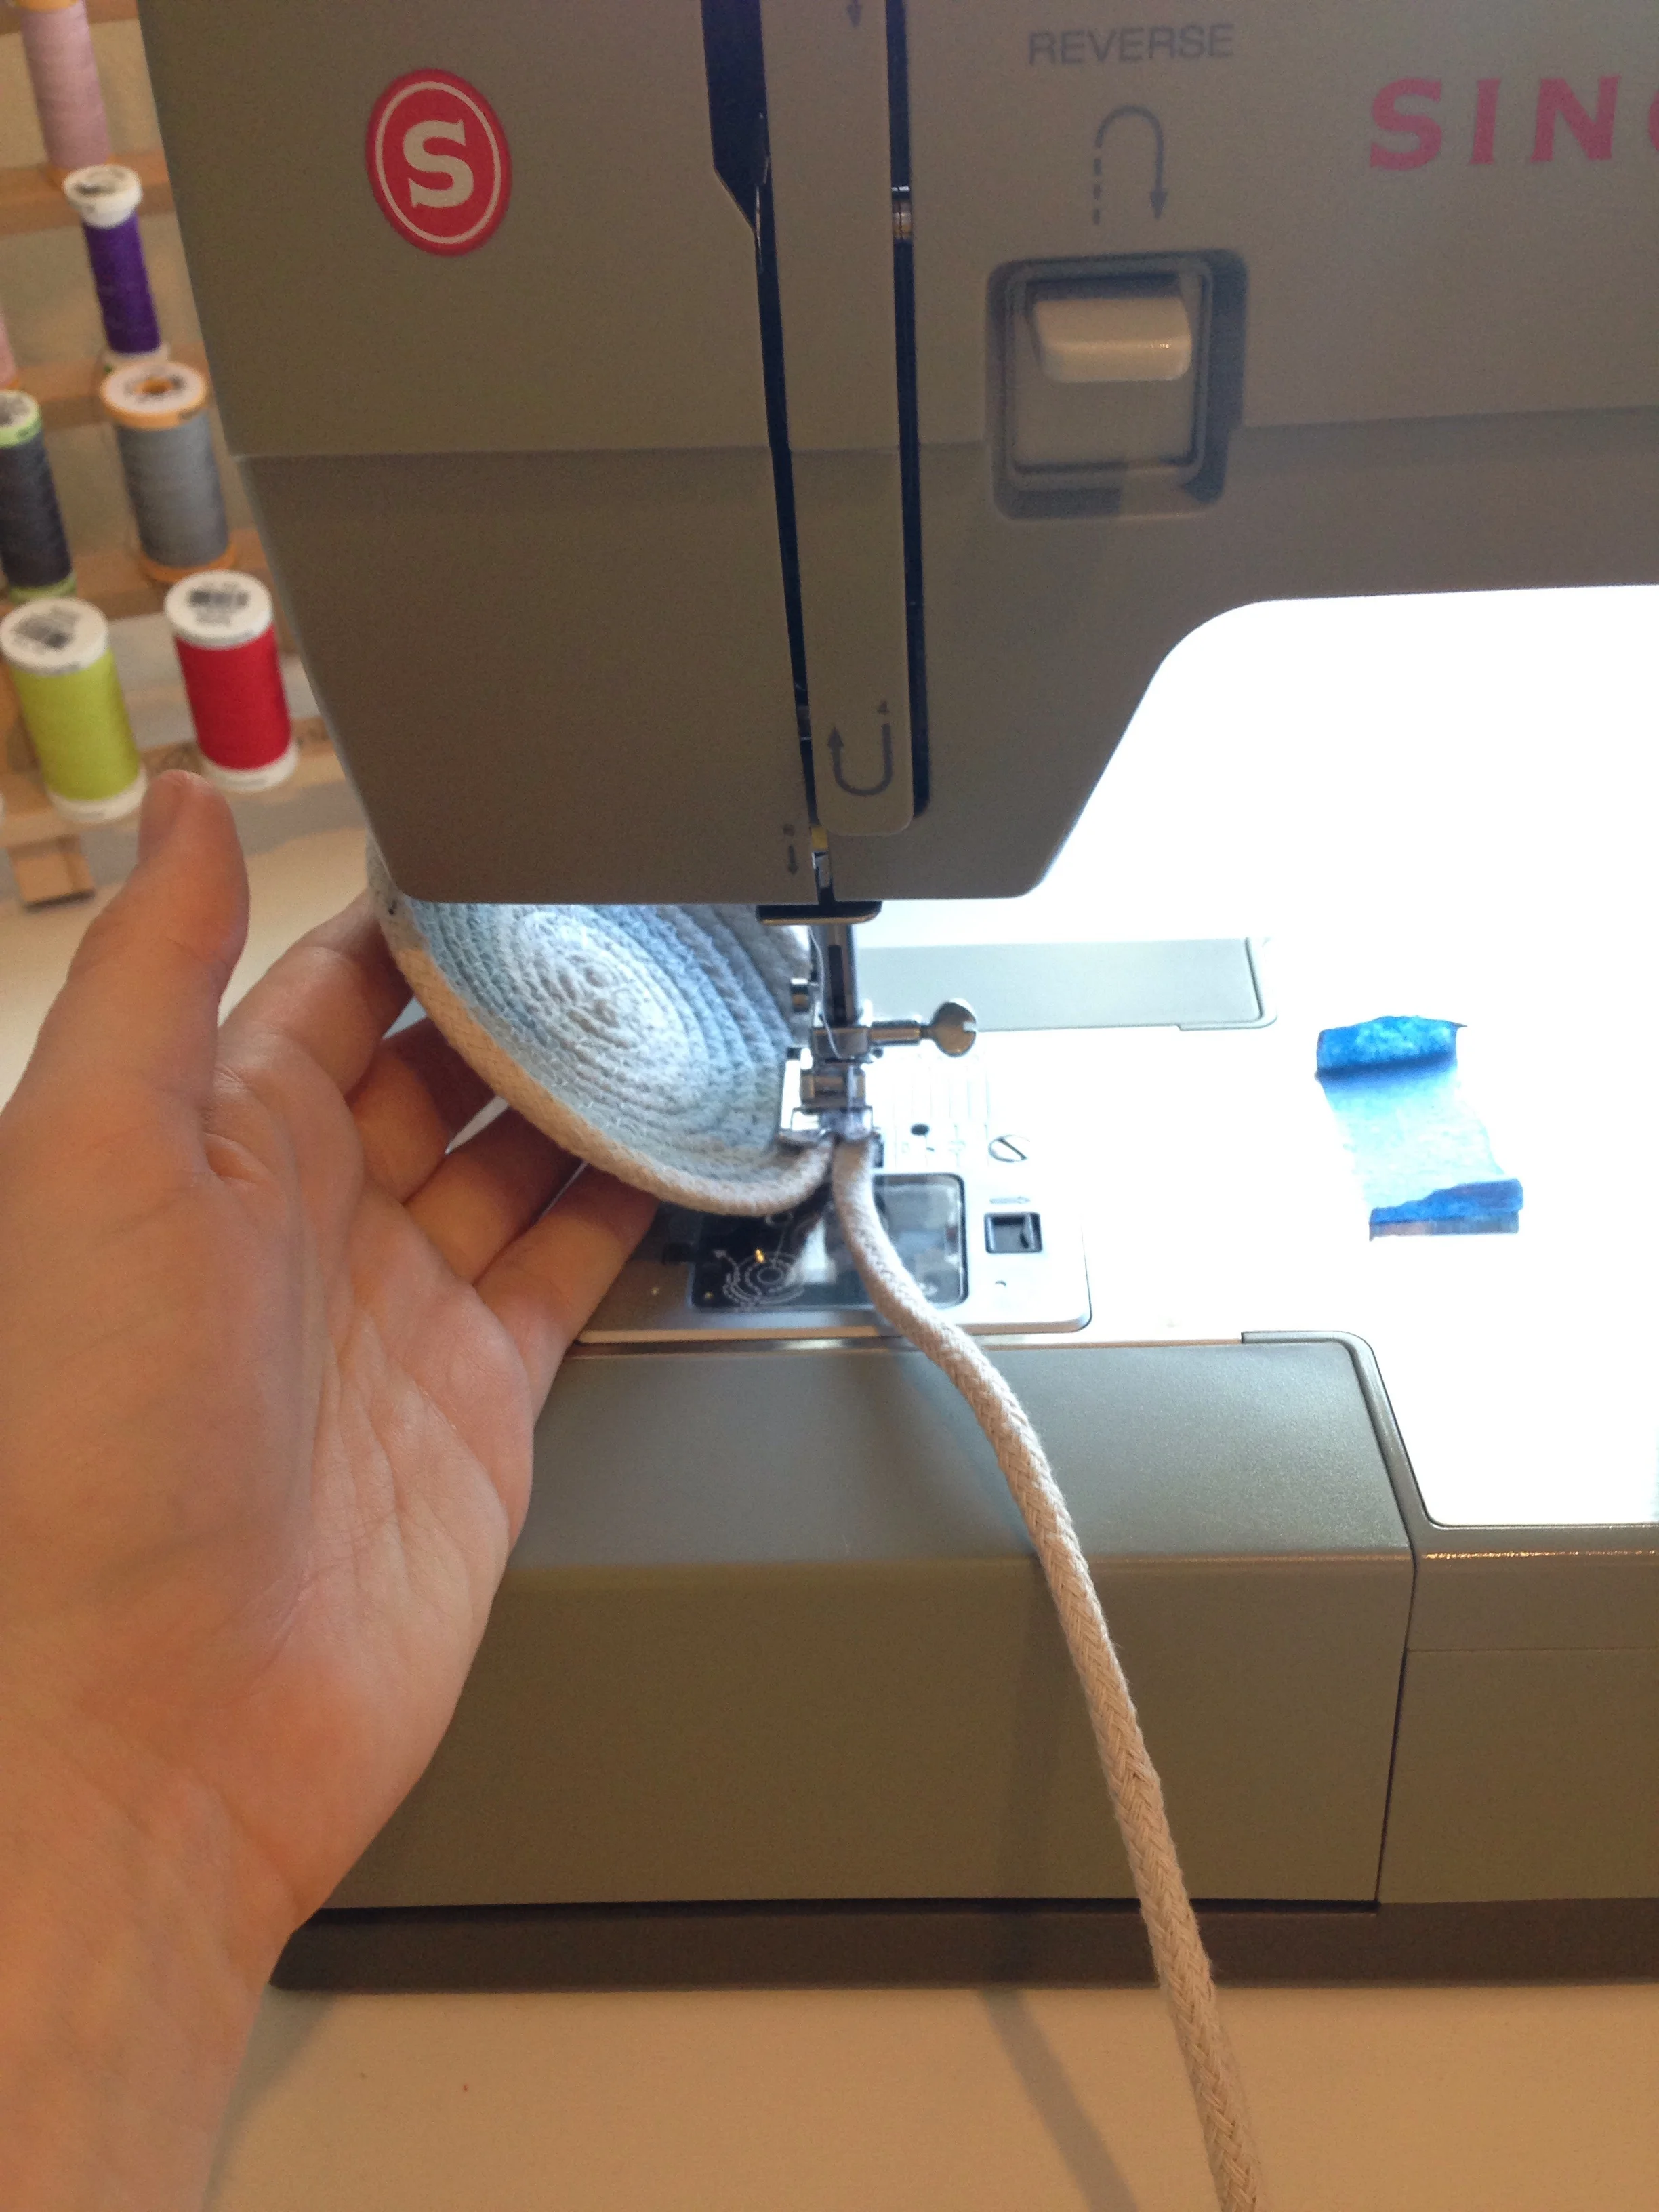
To get started you'll want to use a denim needle and have a couple of bobbins wound and ready to go.
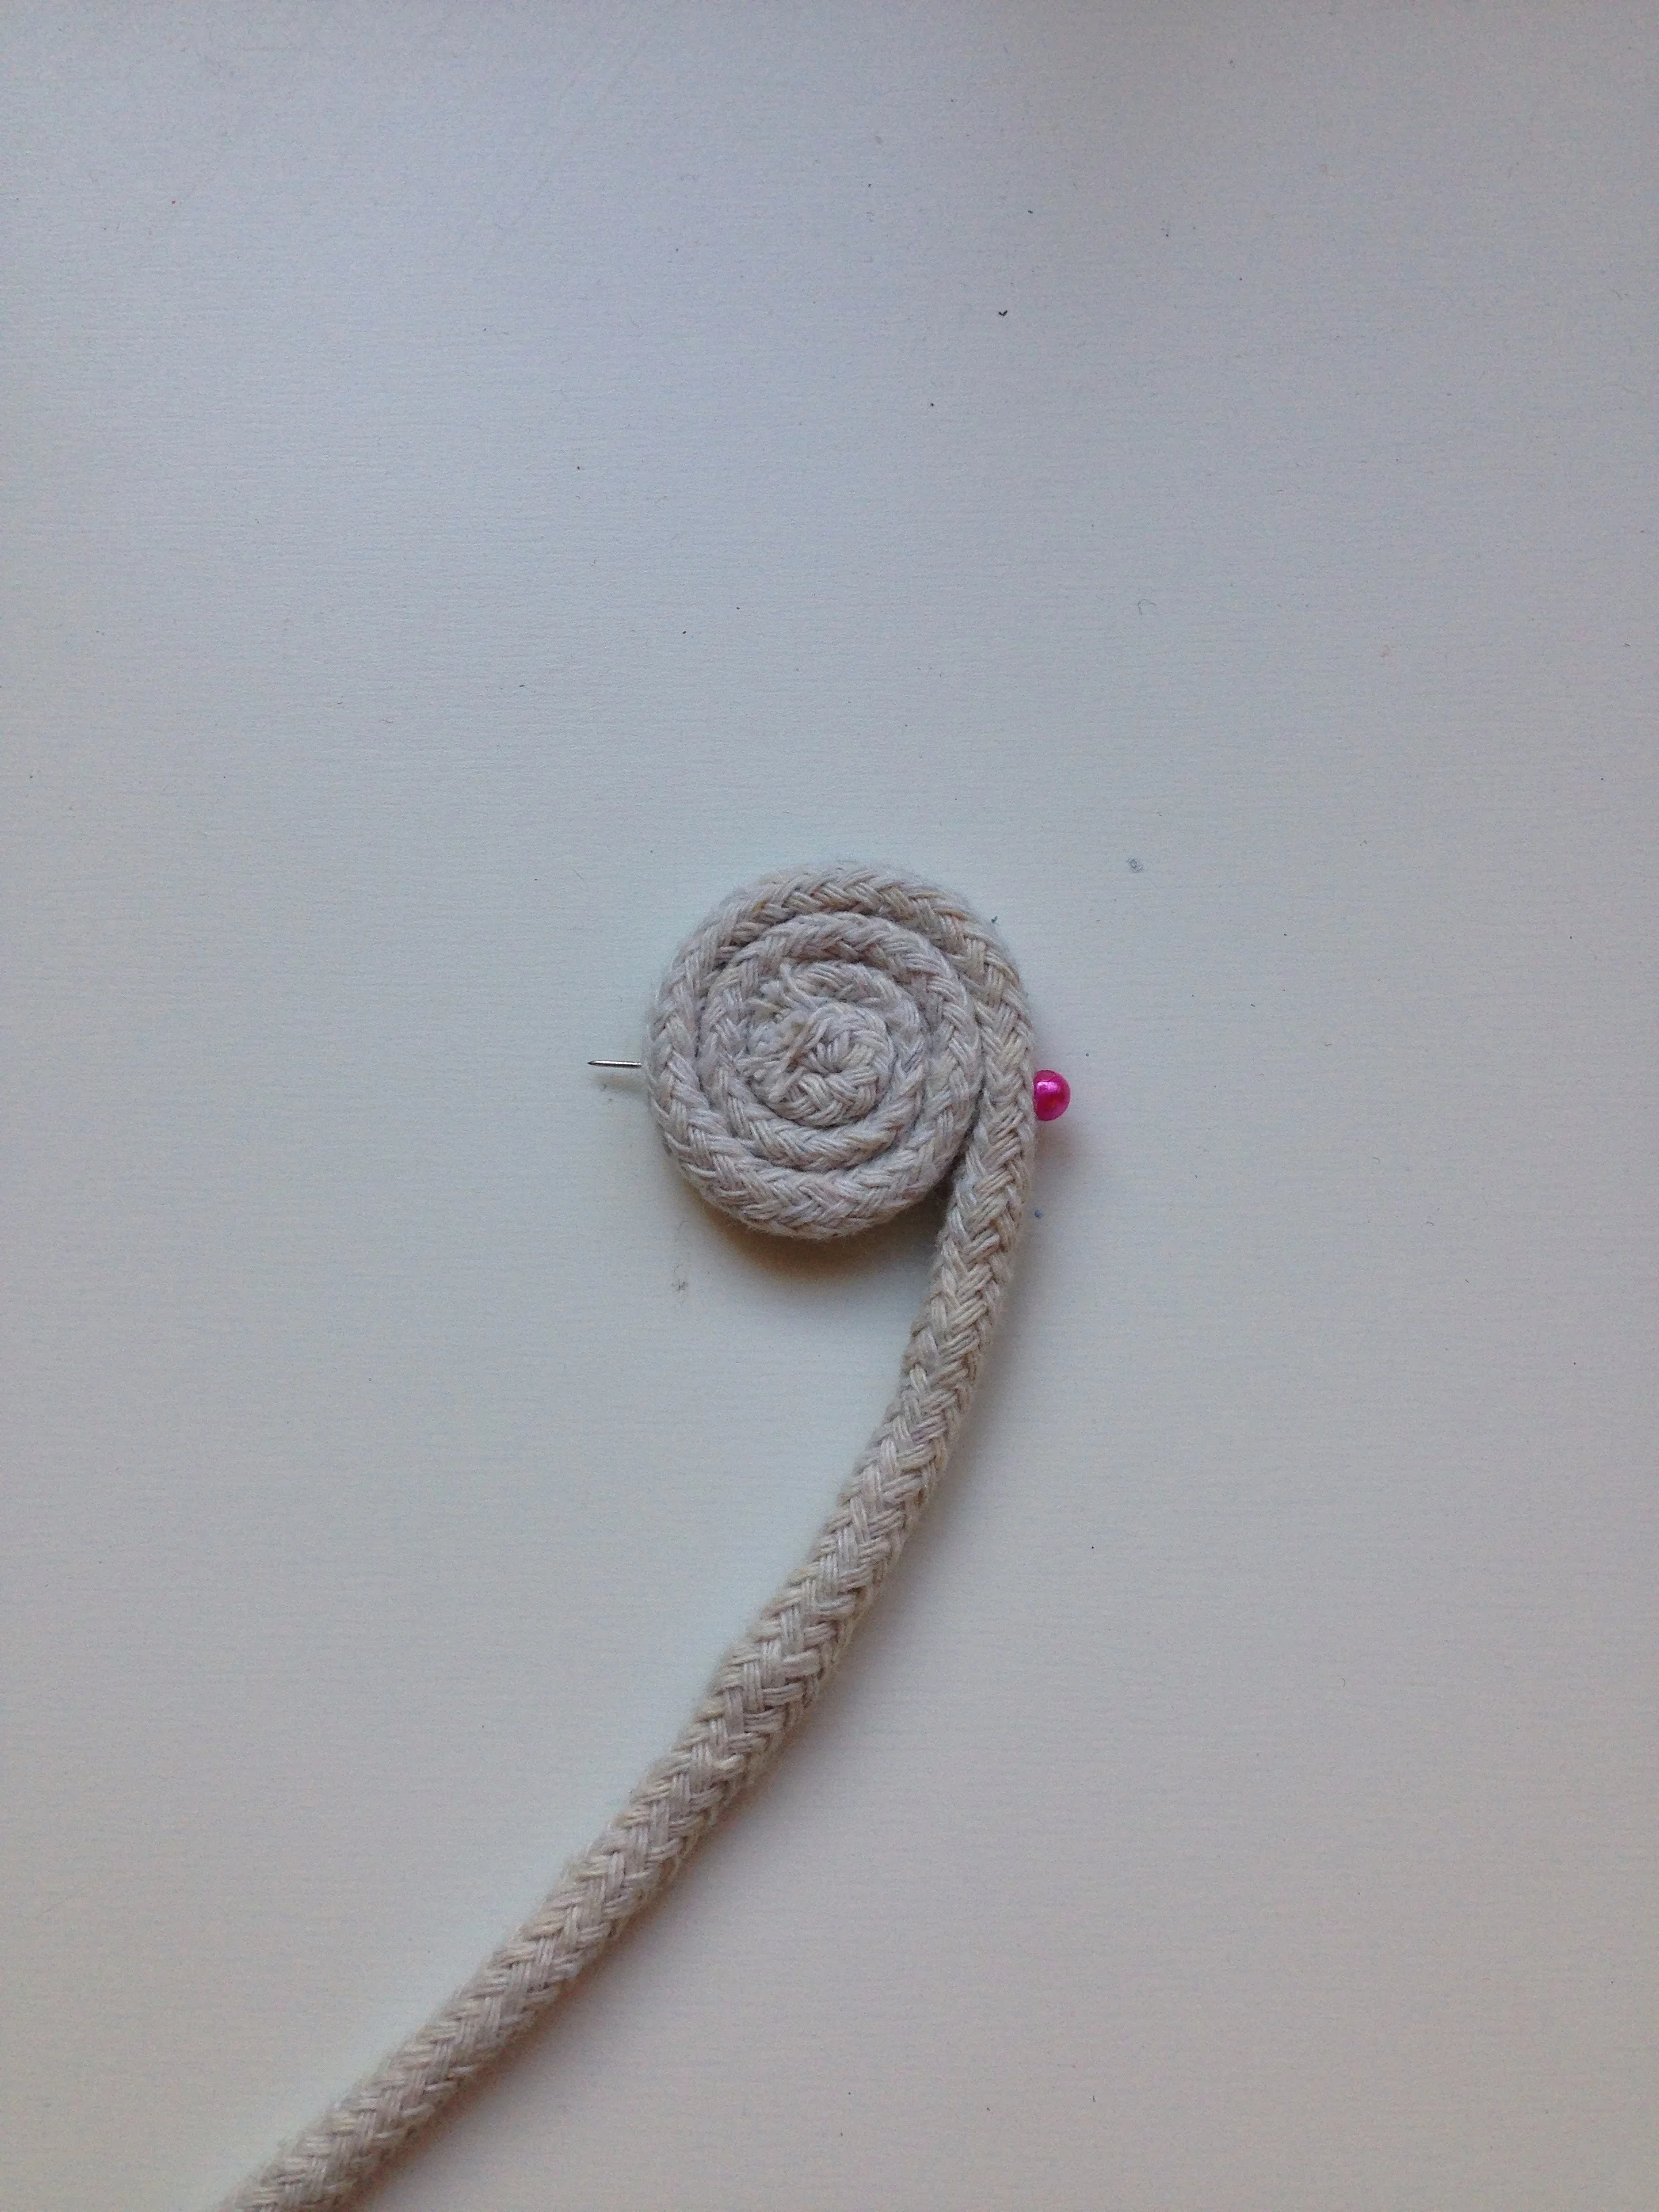
Start by making a small coil 1"-1.5" in diameter. I stick a pin straight through it to keep it together until I get some stitches in it.
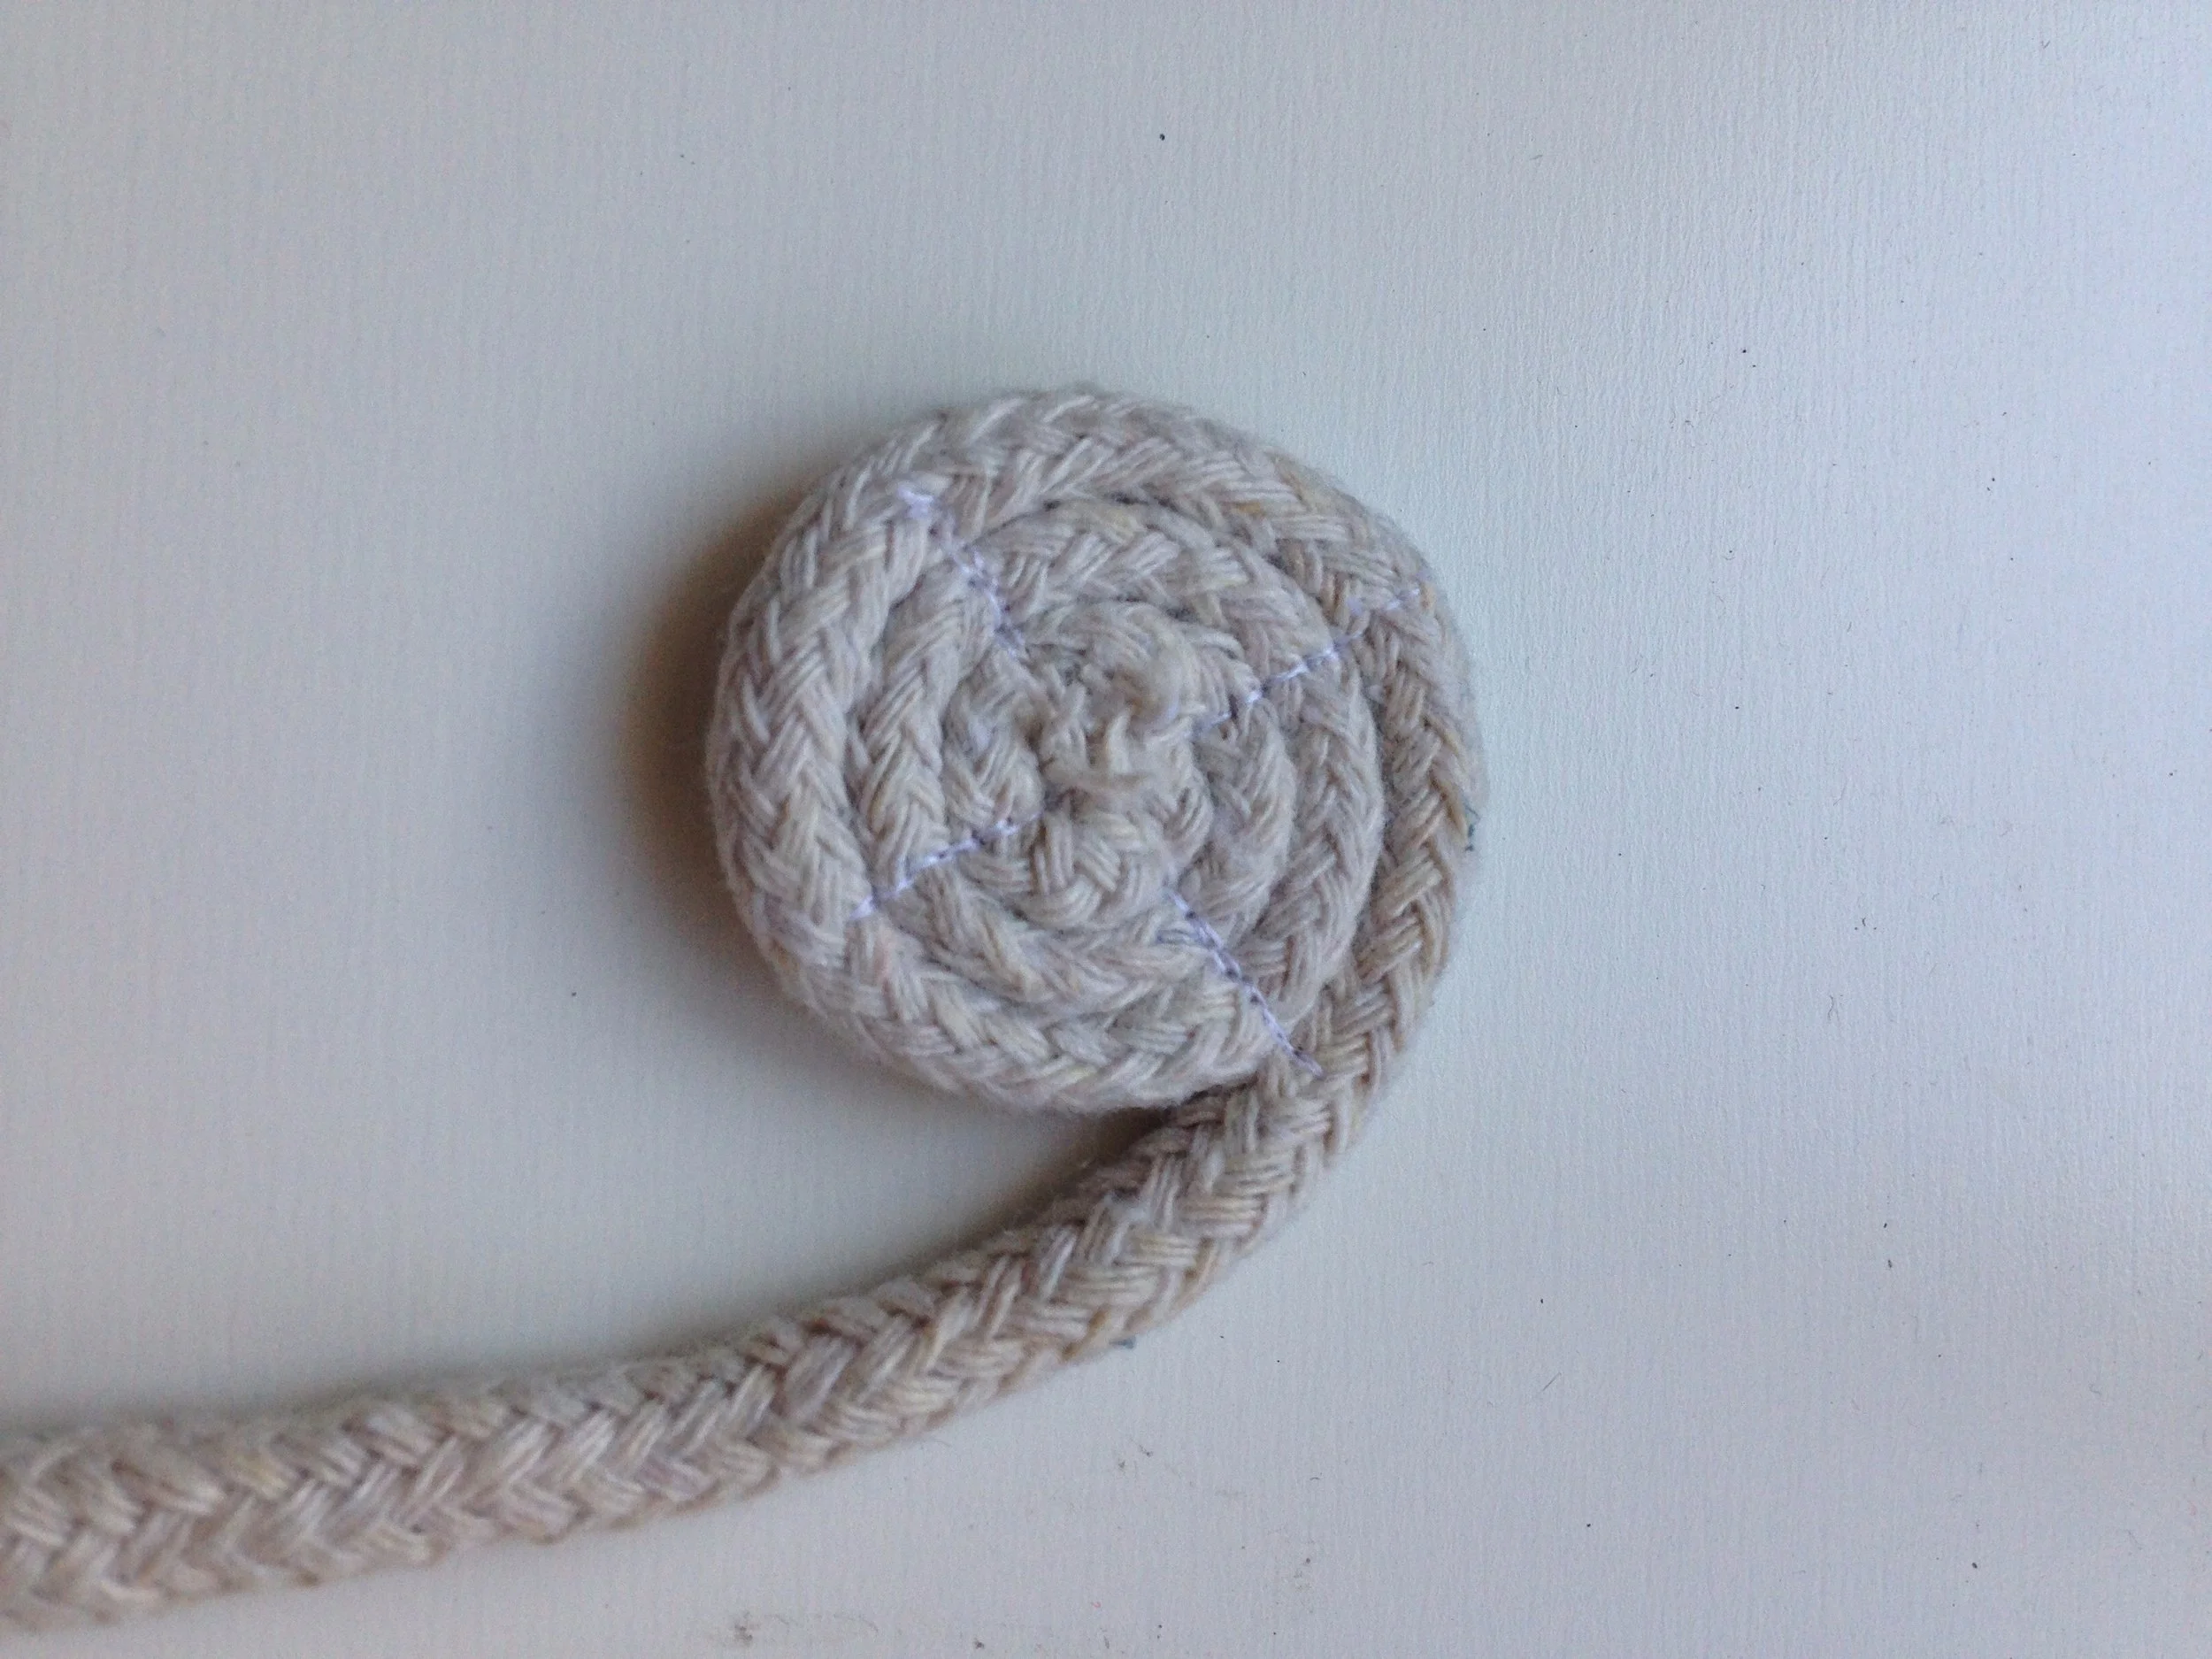
Using a straight stitch, sew across the coil at least twice, but more is better, being sure to back stitch.

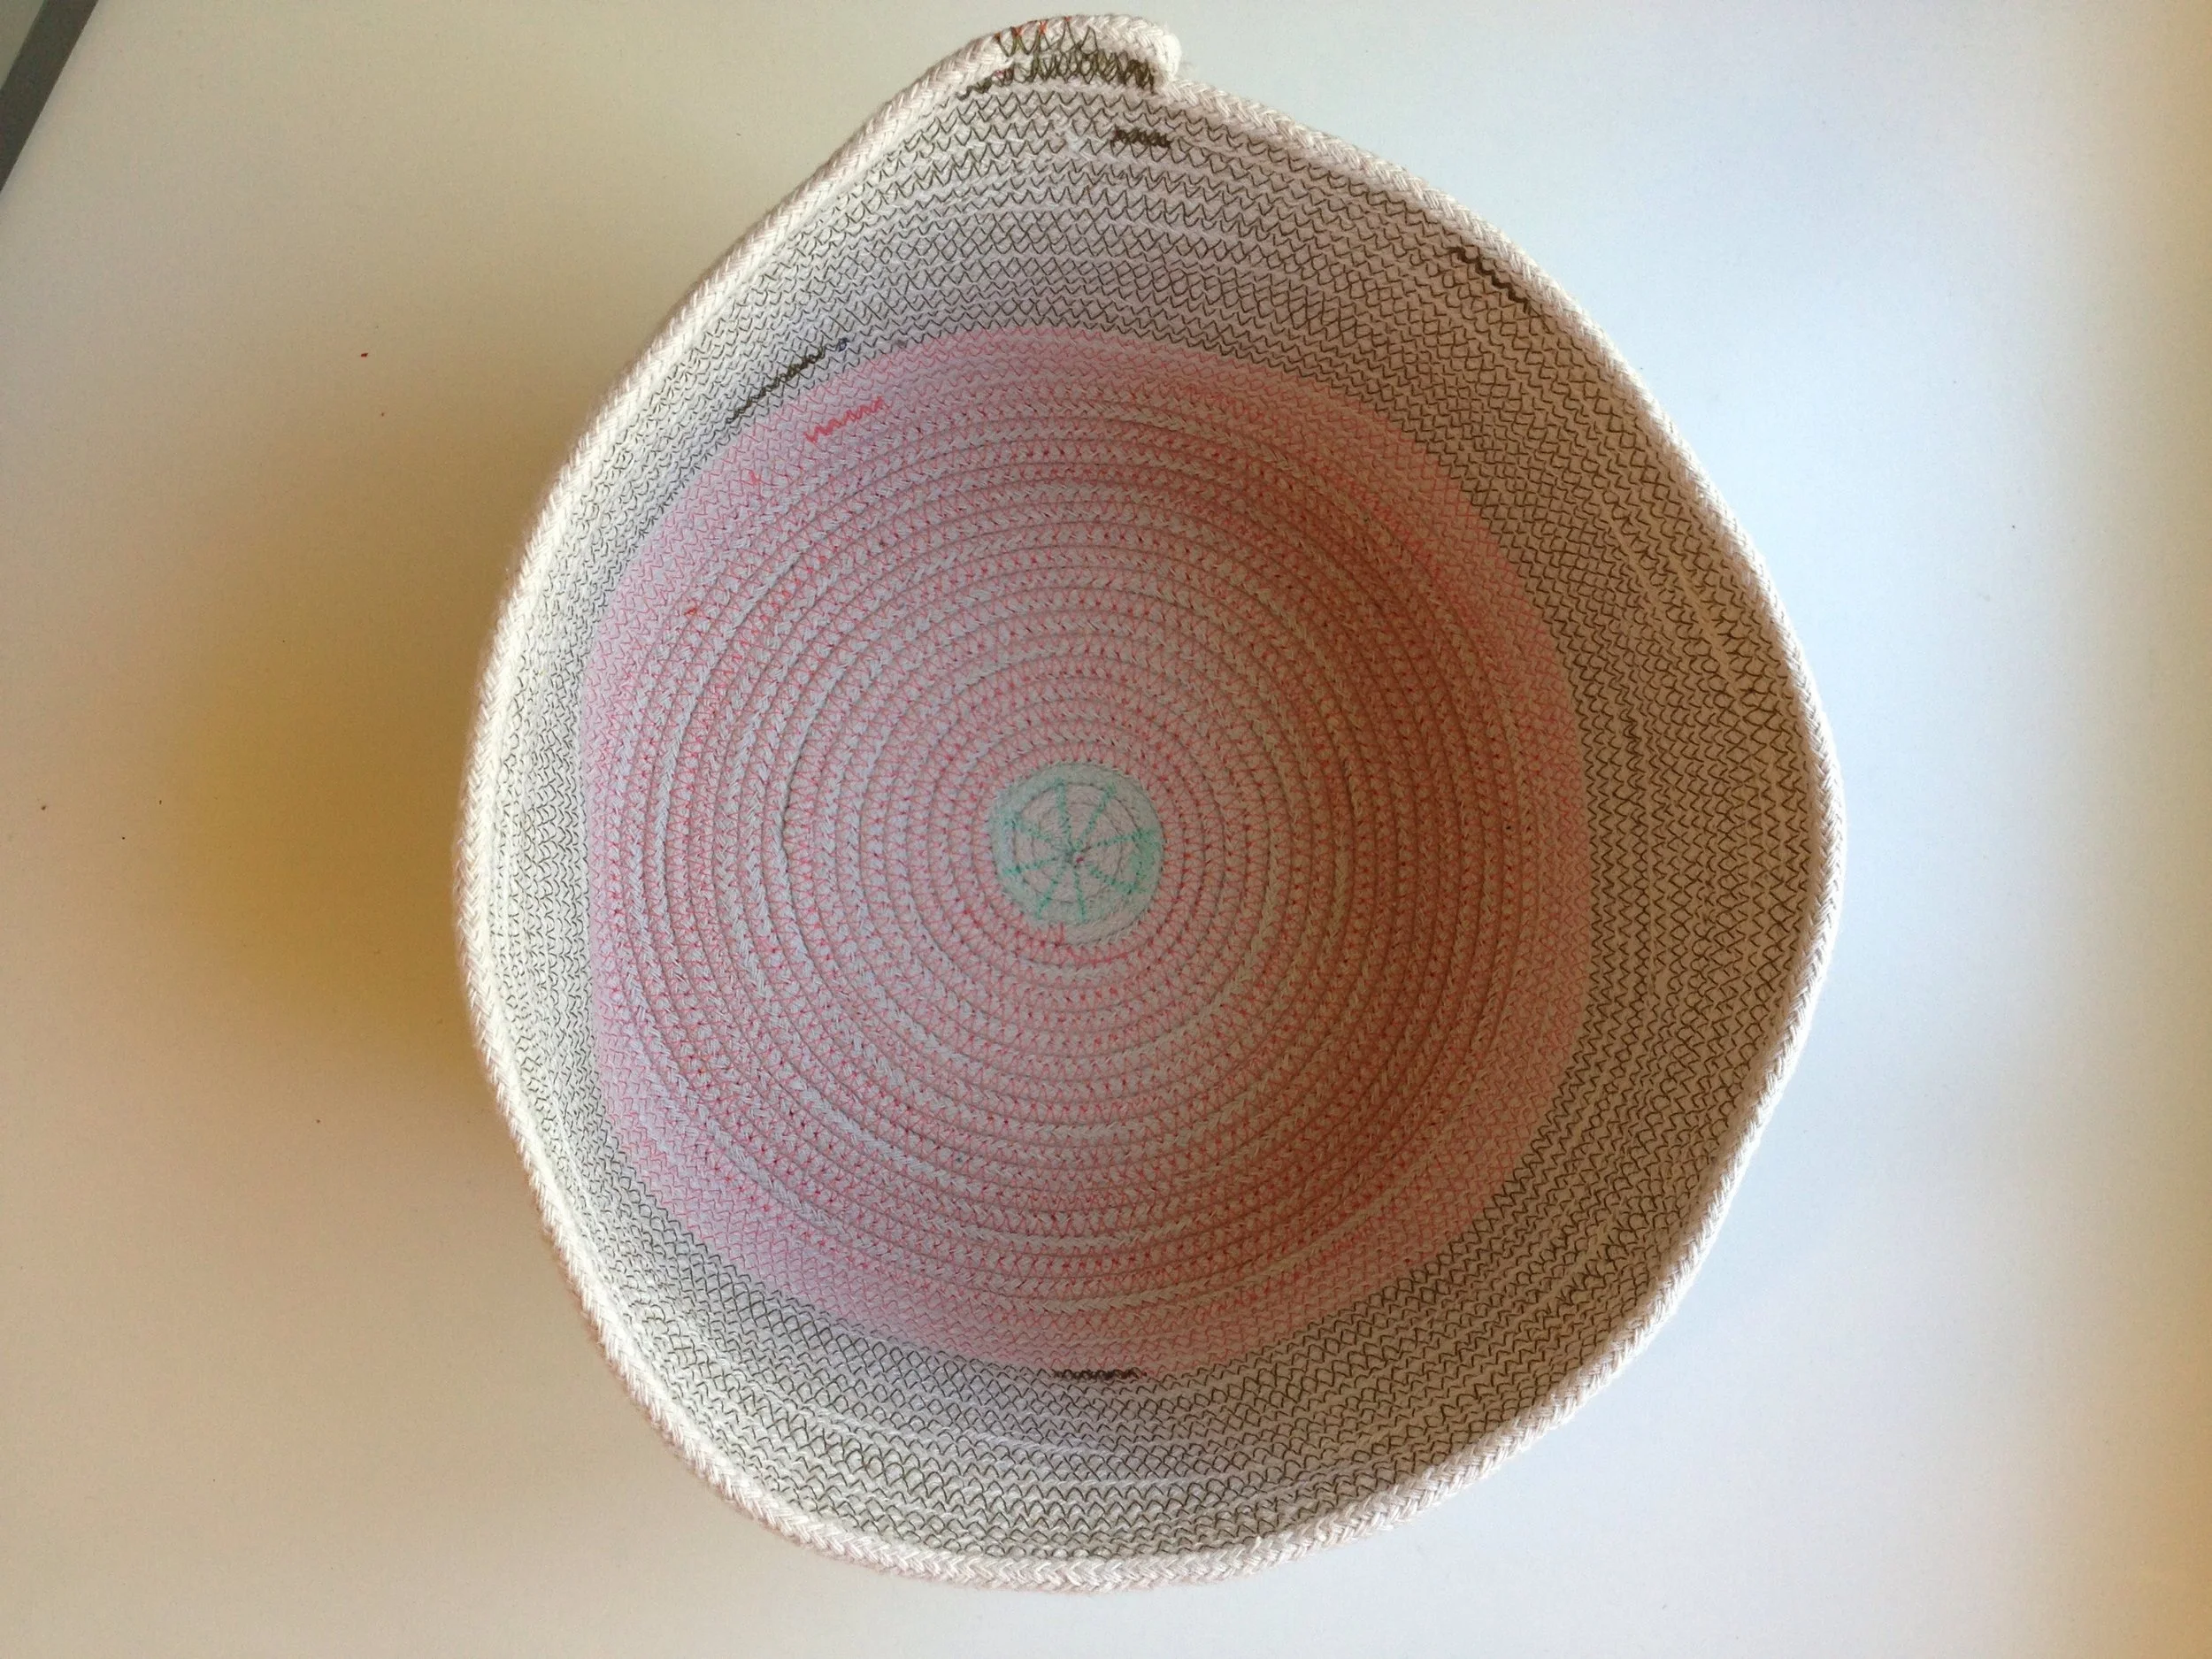
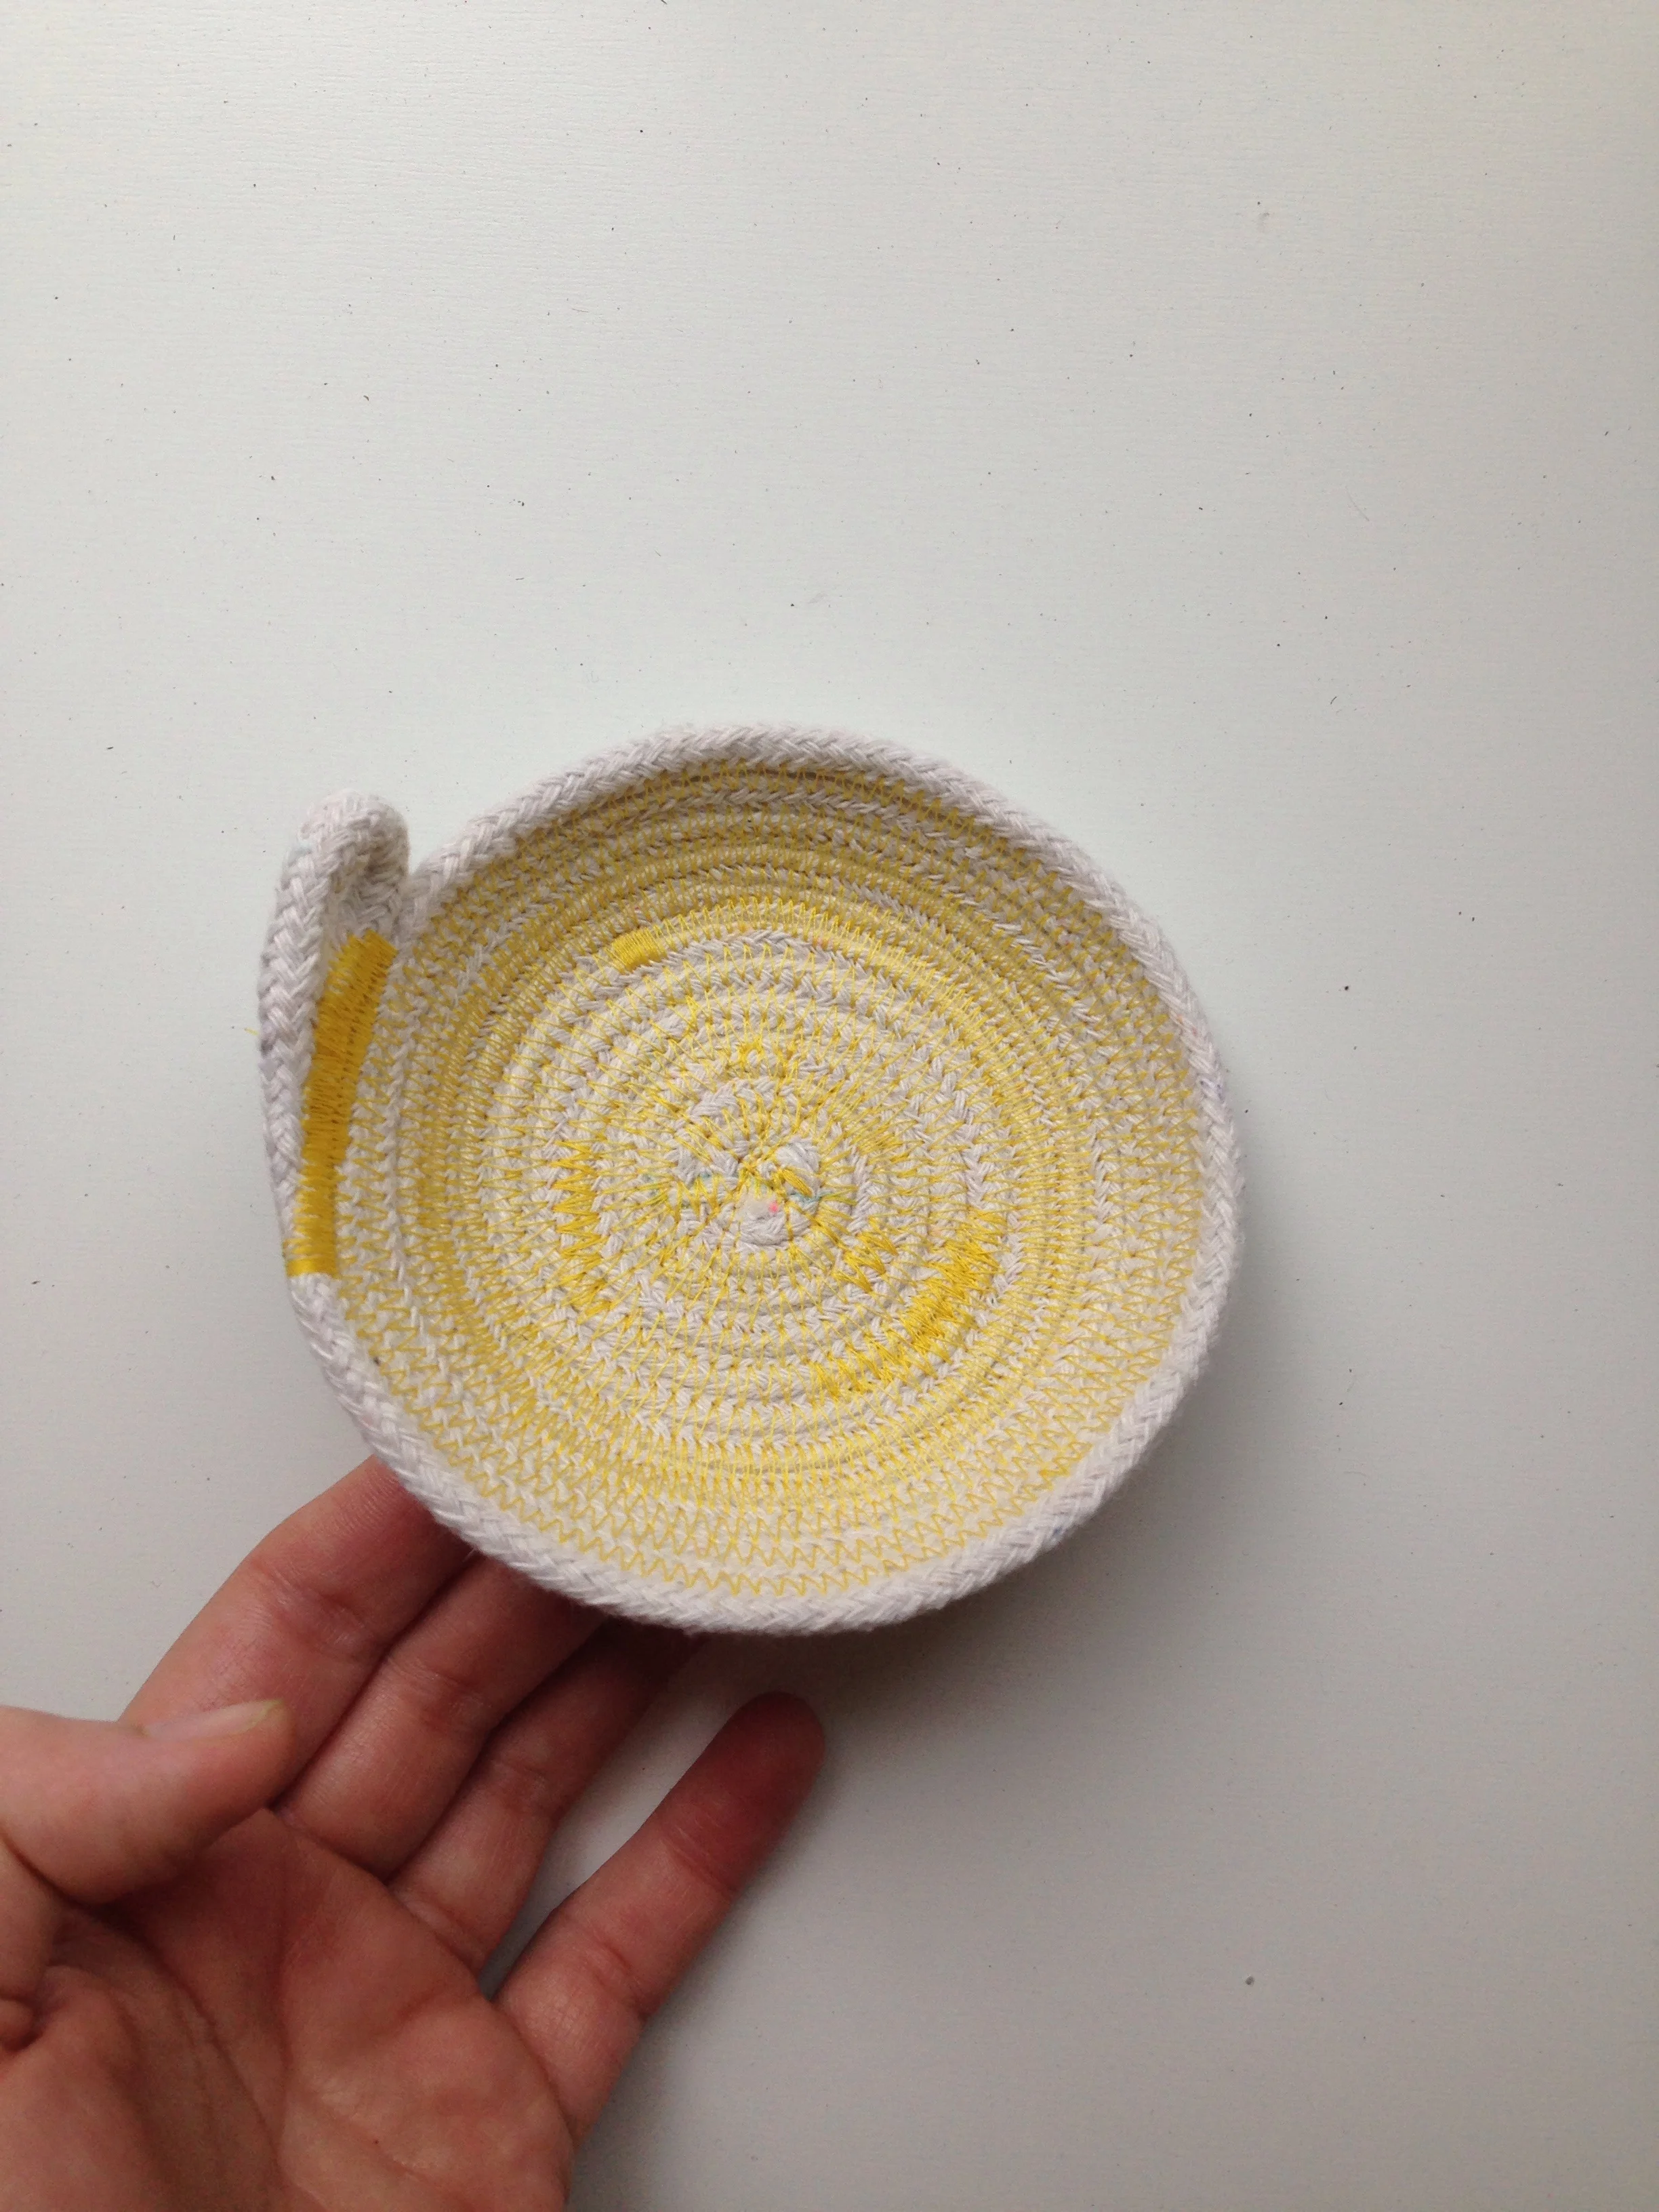
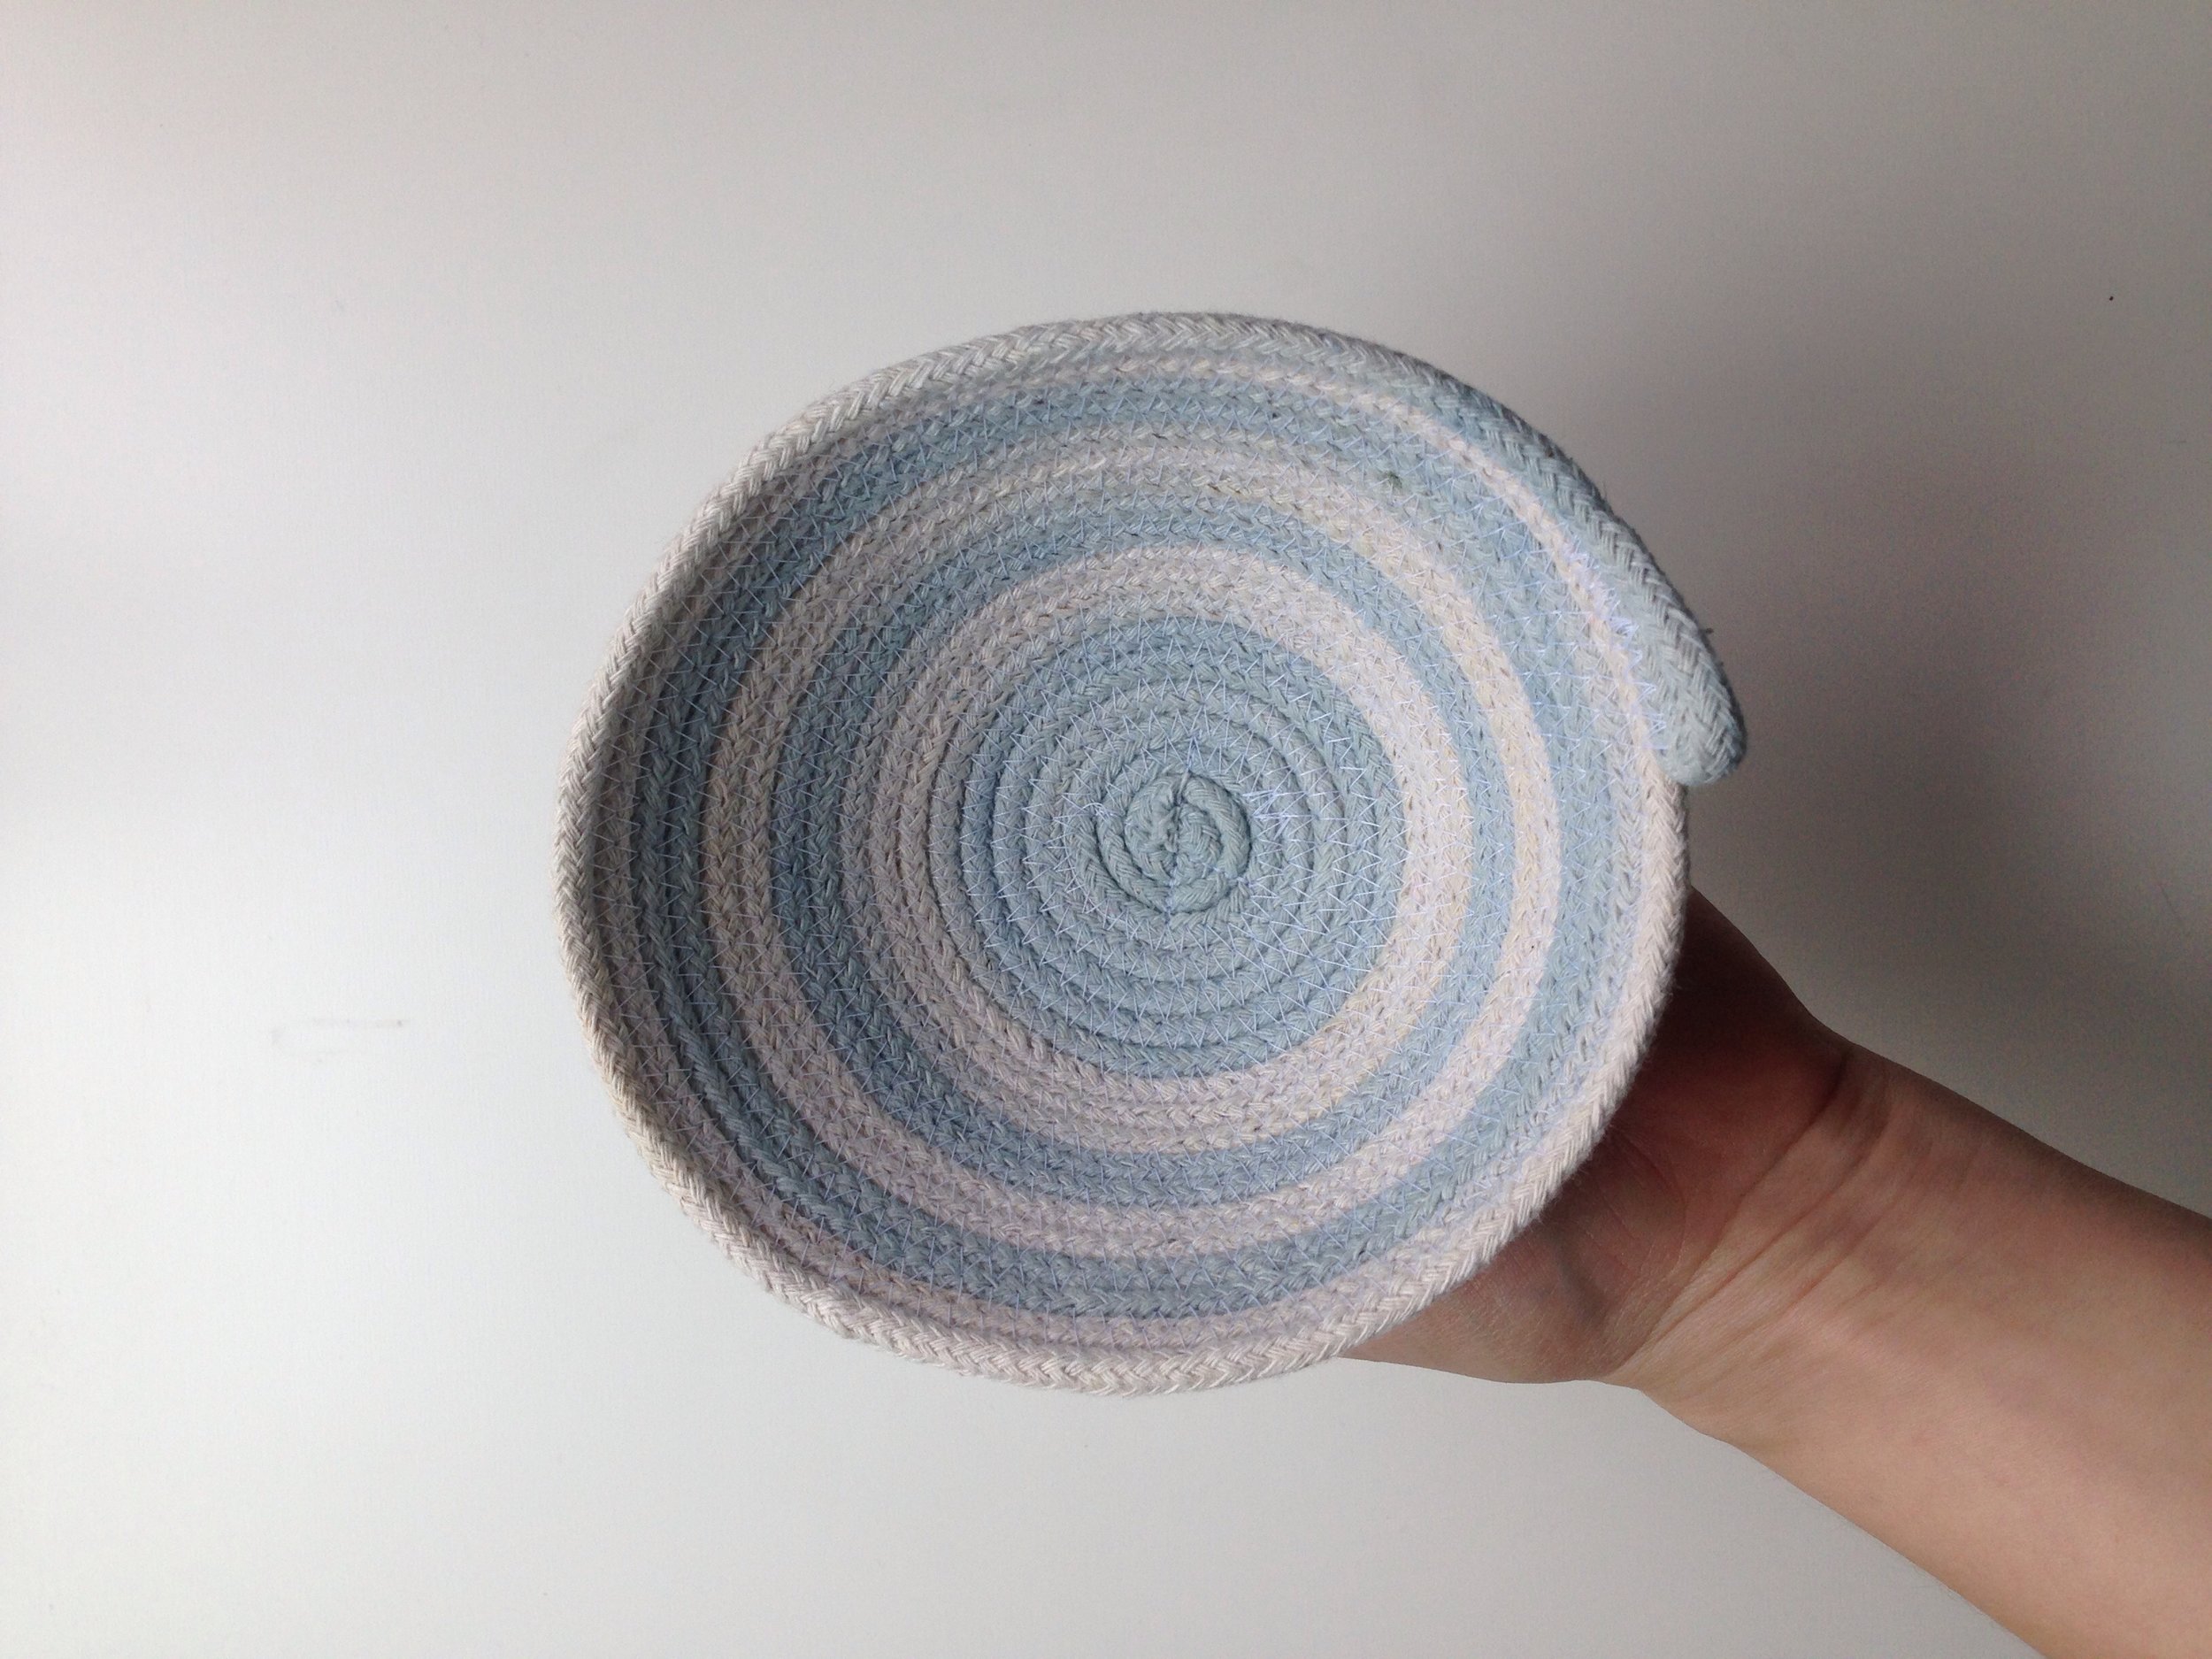
Place the coil under your presser foot so that you'll be winding counter-clockwise, with the tail on the right side of the bowl. Set your machine to zigzag. I use the widest zigzag stitch with medium stitch length (shorter than what you see in these photos is better - oops!). Line up the gap between the coil and the tail under the center of the presser foot. Stitch slowly as you build up your coil. The bigger your bowl gets the more you can let it rip and put the pedal to the metal.
When your coil is big enough, tilt the base of the bowl up (see above) to start building the walls of the bowl. Keep stitching until you like the looks of your bowl. To finish, cut your rope, leaving yourself at least 4". I like to fold the end in on itself, toward the rope bowl so it's sandwiched between the previous coil and the top coil, creating a small loop. Making your stitch length even narrower, I go back and forth over the end to hide loose rope threads and secure the loop in place.
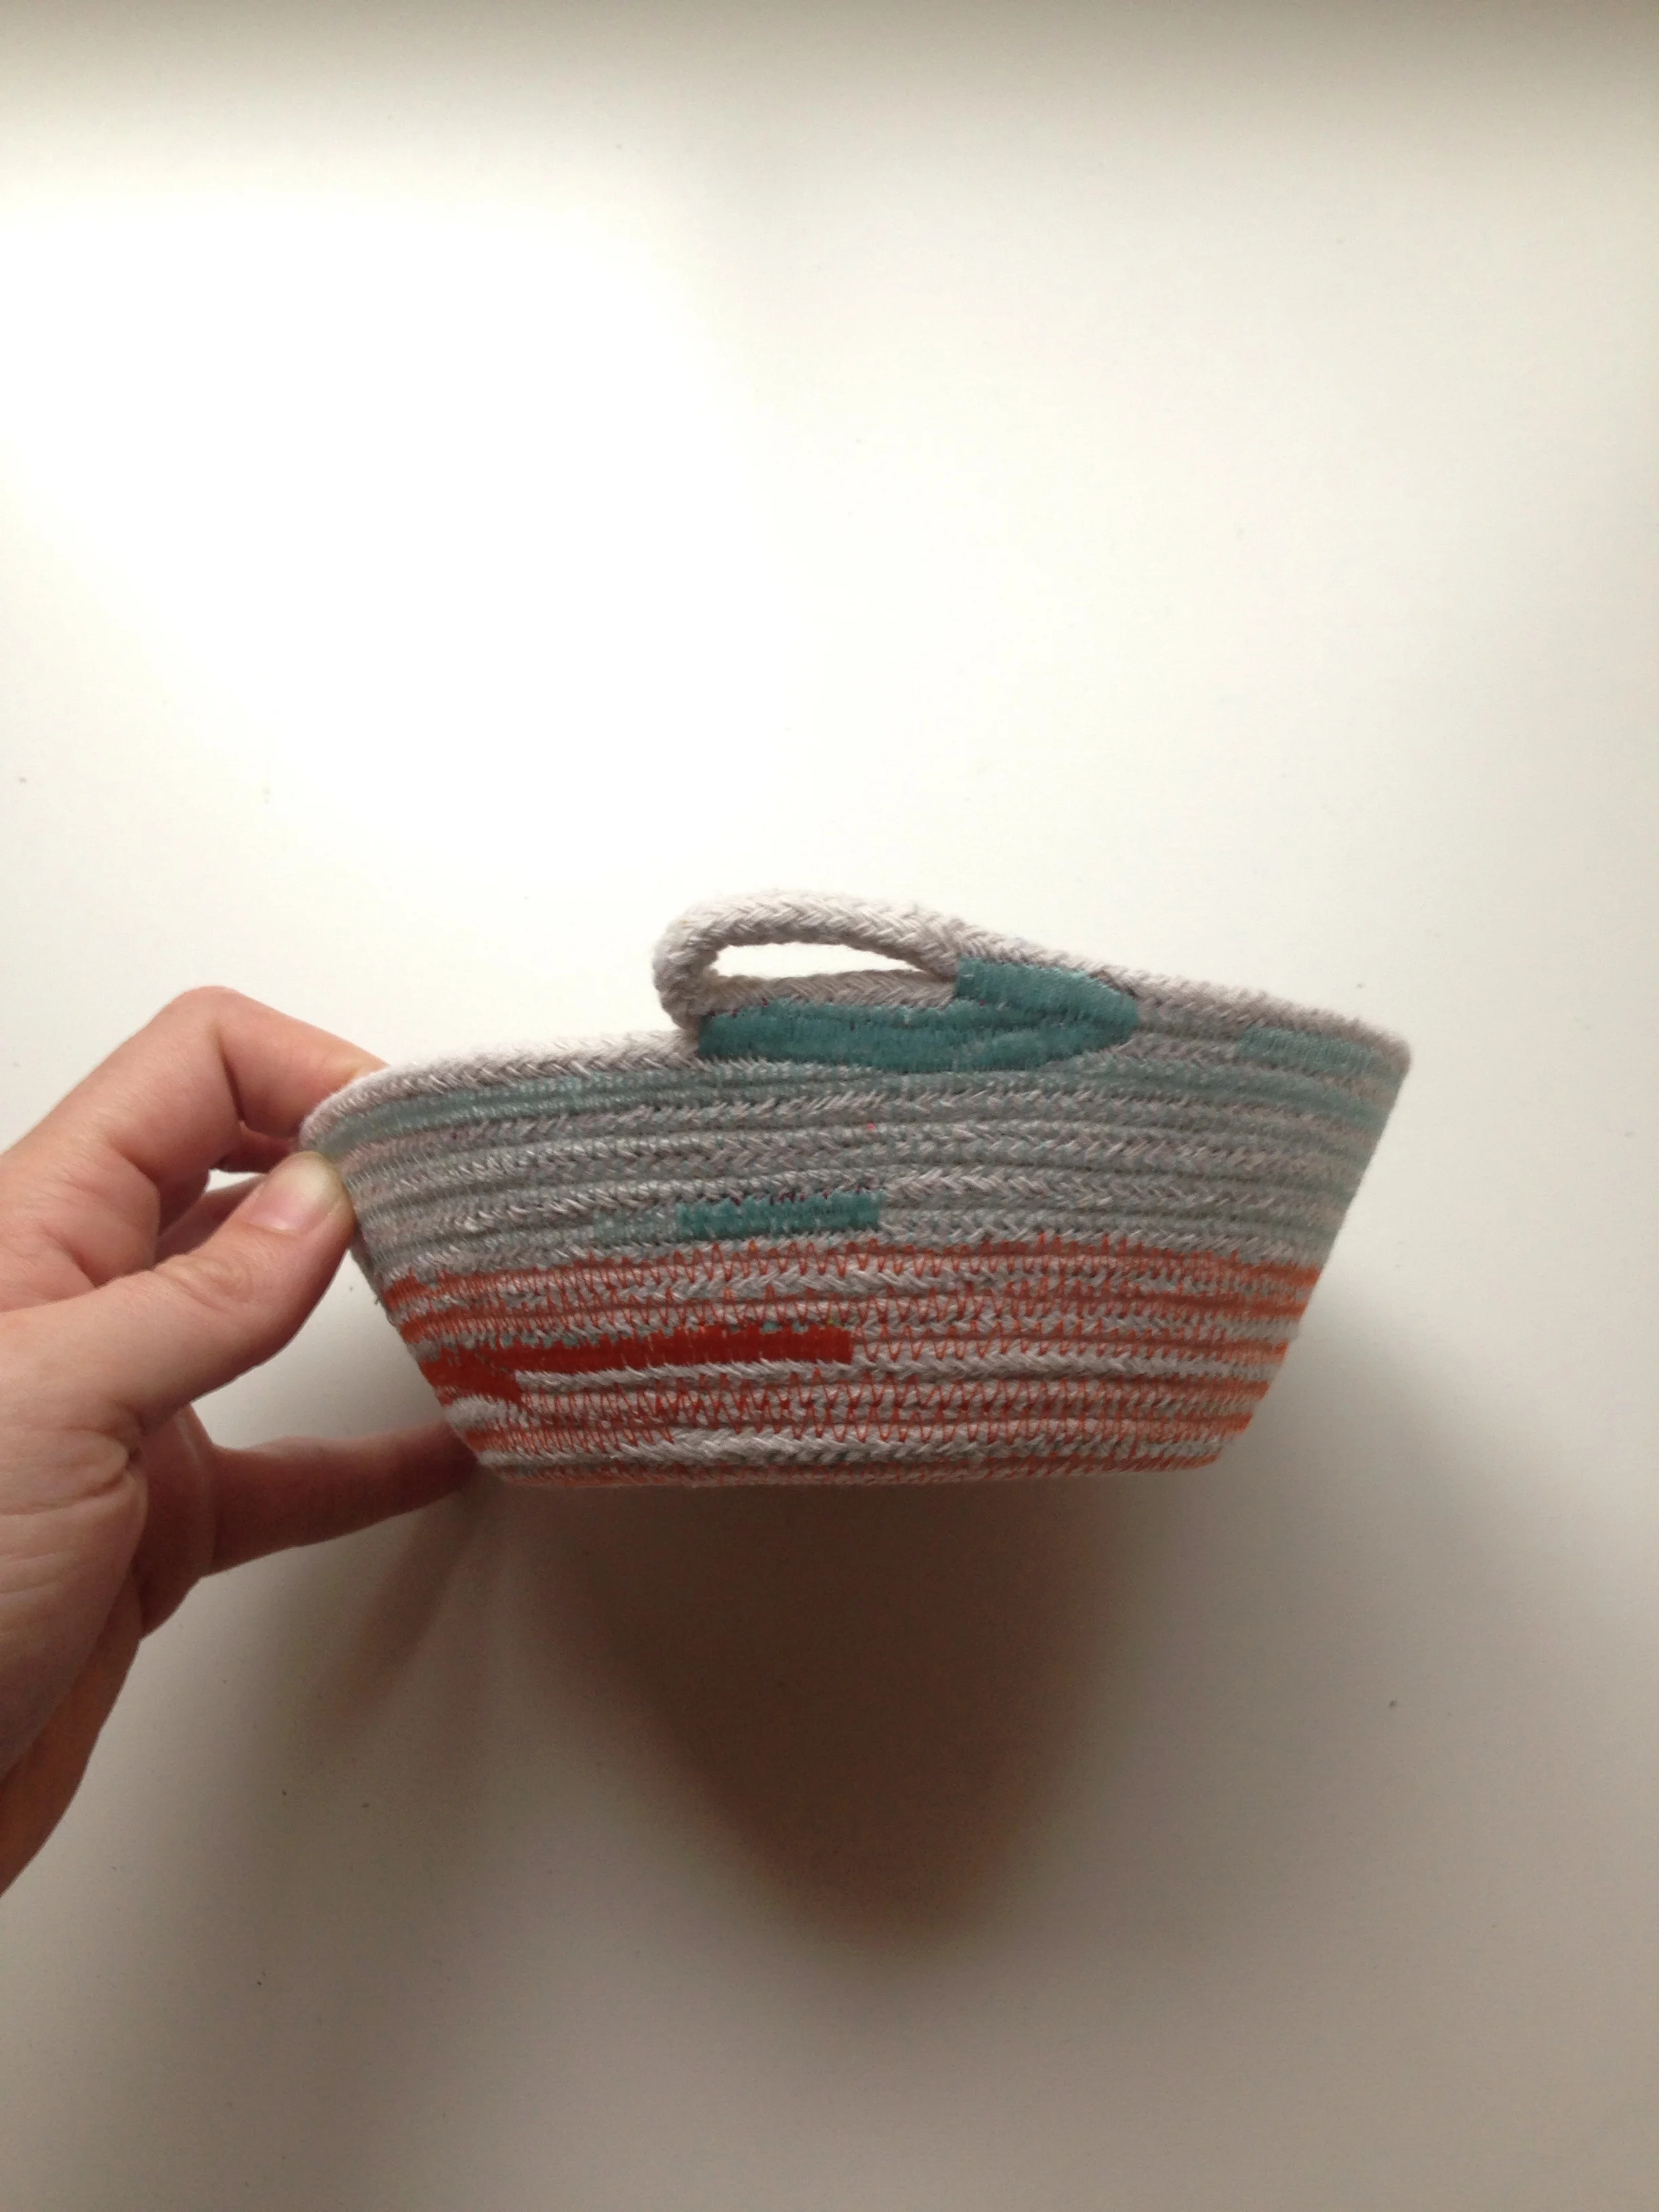
There you have the basics, now let your imagination run wild! There are so many ways to get creative with rope bowls. You can decorate the rope with dye or paint before stitching. I experimented with dyeing rope with indigo, and I really love the variegated look of the resulting bowls. You can also use different colored thread - it's a great way to use up odds and ends! - varying your stitch length, or wrapping the rope with scrap fabric while you're stitching. Whatever you end up doing, I think you'll have as much trouble stopping as I've had! Luckily, rope bowls are both practical and lovely, and make excellent gifts.