—gina
A few weeks ago I had a crafting weekend at the coast with a pair of great friends. I was determined to get through some things that have been on my list for waaaaaaay too long. I also was determined to get comfortable with my buttonholer on my sewing machine. I was successful on both fronts! Over the weekend I completed 16 buttonholes, and they look good.

One of the projects I brought (and finished) was a set of easy napkin rings for us to use every day. We use cloth napkins and sometimes it's hard to remember who had which napkin the night before. Other times it's challenging to convince my three year old that my napkin is not his. So, I got this idea to make personalized rings. I whipped them up quickly and there are a few things I would do differently. I used a Moda Cross Weave fabric for my ring (shown above) and the weight was perfect. I used Westminster Shot Cottons for the others and they were a bit too light weight (shown below).

The length is also something I changed up. I made the boys' rings longer so I could easily stamp their names on them. I'm not sure it's the best length. I think the shorter length of mine works nicely to easily cinch up the ring. My ring's finished length is 10.5”, the boys' is 15.5”. I also got a little creative with some fabric ink and rubber stamps. I headed over to Collage with my son and we chose a set of letters, a blue ink pad and a fancy dragon stamp. (I also discovered that the more detailed the stamp, the more challenging it is to get a really good image on fabric, at least for the novice I am!)

-- Melissa
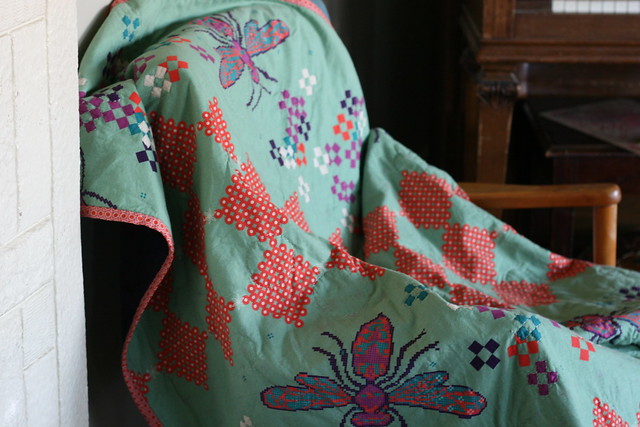
Making a whole cloth quilt can be as simple or as complicated as you feel like you have the time for. Since more and more manufacturers are coming out with larger scale/cheater style prints and are printing them extra wide (I'm looking at you Kokka), you hardly need to take a scissor or even a sewing machine to them to make something beautiful and cozy.
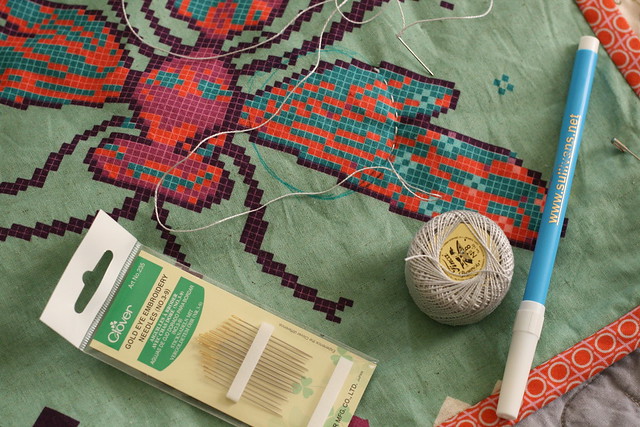
I have recently declared that I am a horrible hand-quilter and only a very mediocre embroiderer. As I don't knit or crochet I've decided that I need to get much better so that I don't feel like such a lout sitting on the couch on the evenings with idle hands watching Mary Tyler Moore reruns. When I saw the tube bin fill up with beautiful cotton/linen blend prints, and noticed that Bolt had begun to carry #8 Perle cotton I knew that I had found a good evening project. There are loads of fabric options to consider, so to start your creative juices flowing I'll list what I used.
Supplies:
- 1 1/2 yards of Melody Miller's Ruby Star Spring. (I debated between this one and another lightweight Echino print I love). This is 62" (!) wide.
- 2 yards Free Spirit Voile. This is generally 54" wide.
- 7 yards of bias or straight cut binding. I used Anna Maria's new precut bias binding and it matches perfectly!
- Batting at least 64" by 56"
- Spool of Silver-ish #8 Perle Cotton
- Gold headed embroidery needles-- they need to be sharp, but also have a large enough head to accommodate the wider thread
- Basting thread or Safety Pins-- I purchased curved safety pins from Modern Domestic
- Optional: large embroidery or quilting hoop and a water soluble marker or other temporary marking tool. Thread Heaven.
Process:
This is the fantastic bit: you start by making your Quilt Sandwich! No piecing! Piecing does not a quilt make-- it's the actual stitches or ties that keep the whole thing together that qualifies it as a quilt. We've talked about sandwich making before so I'll refer you back to this post. I used curved safety pins to hold it together together. Trim off the excess backing fabric. As I was fairly certain I had a pretty tight sandwich and that I would be hand quilting/embroidering it together (which is more forgiving than machine sewing for dealing with wrinkles), my next step was to Bind the Quilt. What? Yes. I bound it using my sewing machine to sew it on, and then regular cotton thread and a sharp needle to hand tack it down.
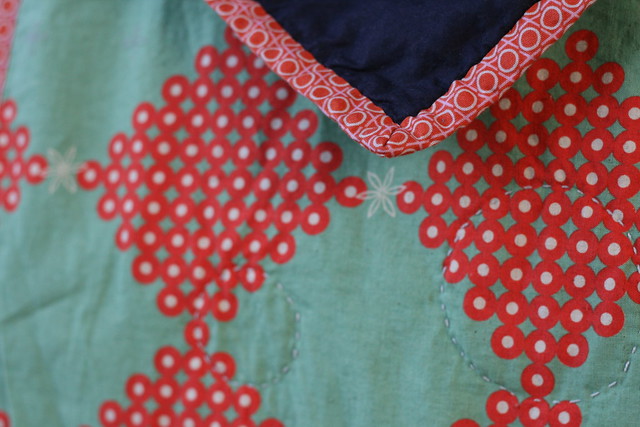
Feel free to work free hand with your quilting or follow the outlines or design of the print your using. I used a water soluble pen to mark the top with circles and then followed the large pixel-shaped printing to make the Xs. The perl cotton glides through the fabric really well. Aided by thread heaven, it goes even easier. The X and O stitching imitates the print on the binding and it makes for lots of pretty contrast stitching on the back.
Final step: Wash and Dry your masterpiece. I didn't pre-wash any of my fabric, preferring it to scrunch up a bit after it shrinks a little bit in the dryer.
You are Done.
In no way are all my stitches even or without mistake, but it was a pleasure to curl up under this quilt every night and get to stitching on my couch. This would make a wonderful holiday/wedding/birthday gift. The voile is so silky and the cotton/linen blend washes up very softly. But don't let that limit you! Check out the soft and even warmer wool stocked in the store right now. I've already picked out fabric to start a new one.
--Meredith

I had a bit of knit leftover from my legwarmers, so I decided to whip up one of those long-chunky-mobius-wrap-a-million-times scarves. The finished ring is approx 12" wide and 100" around. I pieced two 12" pieces that were cut from the scrap, and simply serged them together. I didn't ACTUALLY make it mobius since it wouldn't affect the finished scarf but hey, that could be fun too. Remember, because of the nature of knit, the raw edges don't fray. So this really was a 10 minute project!
One loooooong scarf.

That can be twisted once.
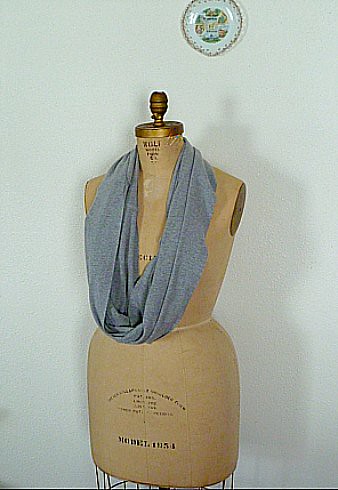
And even twisted again.

--Melissa
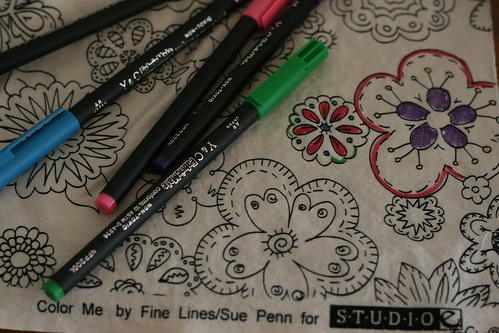
Studio E introduced a line of Color Me quilting weight cottons by Fine Lines/Sue Penn this year. They work in perfect combination with packs of textile markers from Fabric Mate (we carry two different color combo packs).These are non-toxic colorfast fine line marking pens made in Japan. I think kids (and adults) love the idea of drawing and coloring on fabric, especially during these warm days of summer. Of course, any sort of black on light prints would work for coloring in, or you could skip the lines and just play with muslin or solid color cottons.
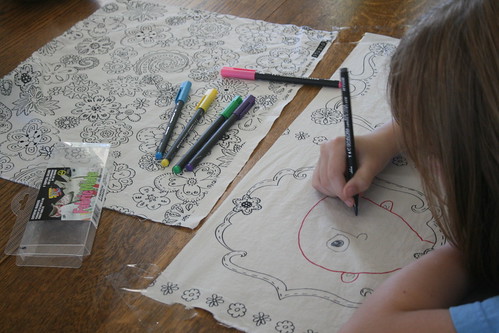
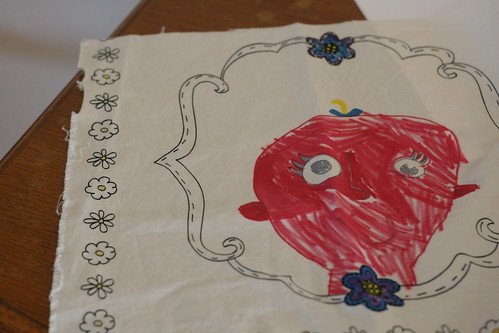
This is the sort of project that could save a whiny afternoon and make you a craft hero. But don't take my word for it! Our 9 year-old friend, Stella, was over and spent part of her afternoon trying them out.This girl is kind of a tough customer.
M: What do you think?
S: They are pretty good! They are definitely better than regular markers. The colors are bright.
M: Are they easy to draw with?
S: Yes. They are very easy to draw with. It takes a while to color big areas in though.
M: Well, it is a lot of pink.
S: Yes, it is a lot of pink.
Ideas for your finished masterpieces:
- Finish the edges for lunchbox napkins or sew into a simple drawstring bag for dance or soccer shoes.
- Sew into a twirly skirt or kerchief.
- Buy several yards and use as a table cloth for your next dinner or birthday party! Have markers out for your guests and you'll have s memorable and long lasting keepsake.
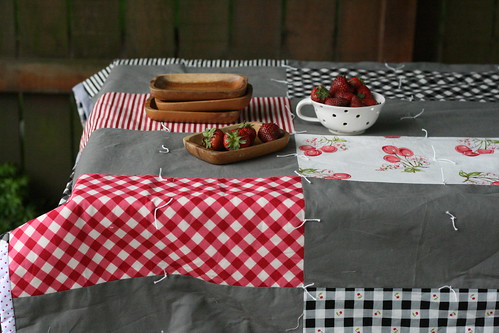
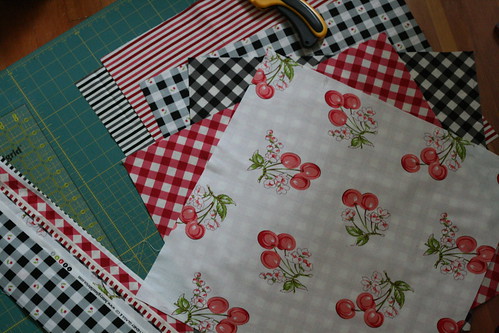
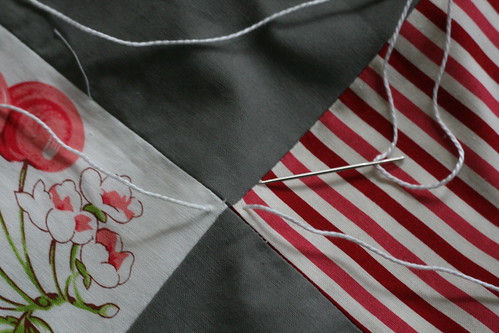
In keeping with our series of project ideas for beginners, I give you the June Picnic Throw. It's a handy blanket measuring approximately 52" by 72", which is big enough to cover a small to medium picnic table or wrap up in at an outdoor concert. I love traditional gingham check for picnics-- especially red and white. This is a variation on that theme that is yelling for summer to come on over.
We're going to use:
- 6 piece fat quarter pack. These prints all come from Henry Glass and Kaufman.
- 2 yards of coordinating solids (the extra will be for binding)
- 2 1/8 yard 54" or wider fabric. You can also piece the back from two 1 1/2 yard 44" inch or wider pieces of fabric.
- You can choose whether or not you'd like to interline the throw with quilt batting (I did) or leave it on the thin side, which is just as nice for summer.
- a skein of pearl cotton and a sharp needle with a large head. A curved upholstery need is handy but not necessary.
First off, cut your fat quarters into 18" square and then in half again. You'll now have 12 rectangles measure 9" by 18". Keep the scraps. We'll use them to piece the binding. Now cut 12 rectangles 9" by 18" out of the coordinating solid.
Placing right sides together, sew one print and one solid down the longest side. Repeat until they are all done. Press open all seams.
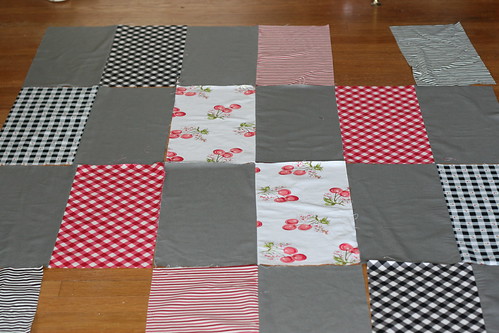
Lay out your blocks. These blocks will now by 17 1/2" by 18" long and you can leave them this way, or you can trim them into 17 1/2" square blocks. If you trim them, you can lay them out by alternating their direction to create a more interesting pattern. Or! Keep them as rectangles (I did) and put them together how you would like them. At this point, I stand back and squint at the finished top from all angles. By squinting, you'll be able to see color and value distribution.
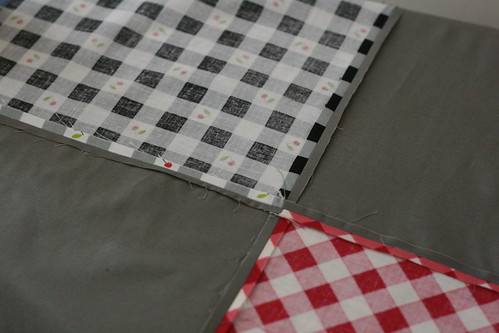
Stack them in order and move them to your sewing machine. For this design, we want our points to match, and so, we're going to sew them together "end to end". Place a straight pin through both seam allowances, matching the points exactly. Remove the pin just as you come to sew over it.
When the three rows are finished, piece them one to the other using the same method. Press all of your seams together.
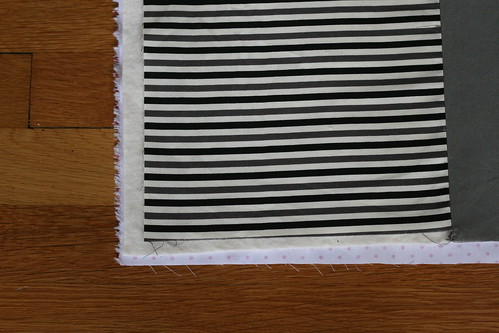
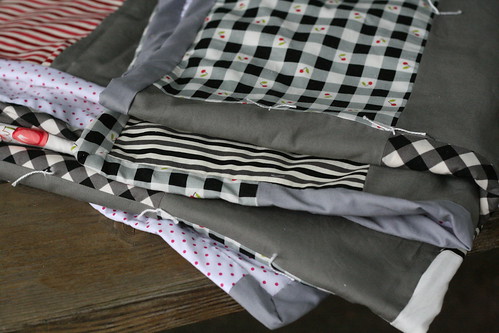
Make a quilt sandwich! We went over this in our baby quilt and even though this throw is bigger, this sandwich is going to be even easier because we're going to tie our blanket instead of sewing it together. Still, make sure all your layers have been pressed and smoothed and pinned together with safety pins ever 6" or so.
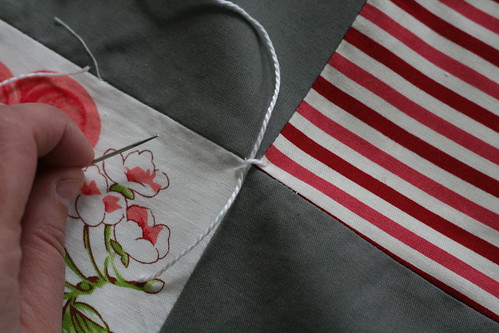
Why tie? Well, for a quilt this size, I sometimes have a hard time wrestling it through my machine. I can always hand quilt it, but I don't want to worry about my stitches getting walked on or rolled in the dirt at the park. Tying is fast and keeps things where they should be. To tie your quilt, cut a yard of thread and put it through your needle. Start in the middle of your blanket and thread it through where the points come together. Take care to make sure that you're going through all the layers. Leave a 2" tail on either end and snip. Move on to the next point. Once you have our points tacked, knot your tails together. Keep tacking until you have knots every 4" or so (full disclosure-- mine are too far apart! I knowingly did this to get the quilt finished. Now I'm going back and continue sewing ties in between the ones that are already there which should space them out nearly perfectly).
We are almost done. All that's left is to bind it up-- use your scraps and any leftover backing fabric after you've trimmed your blanket and sew a continuous strip of fabric at least 260" long (it sounds daunting, but once you get going you'll have a strip in no time). Refer back to part three of our baby quilt for links and suggestions on this one. Once you've bound one quilt, you'll quickly master doing it again!
This is such a fantastic gift for a Spring or Summer wedding. It's quick, handmade and filled with promise about all the fun the lucky couple is about to have.

--Melissa
This little bit of warm weather we're having put me full in the mood for some summer sleep wear. We don't have AC in our house and I usually switch over to wearing old boxers by the 2nd or 3rd night of any serious heat wave. No more! I put together these sweet Madeline Mini Bloomers to wear if'n we get a real summer going around here. This is really just a one afternoon type project, especially if you go ahead and print out the free pattern from Colette ahead of time. It only takes one yard of fabric, several yards 1/4-3/8" elastic, and some ribbon. I picked a lightweight tiny gingham check, but for my next pair I'm going straight up voile or lawn. For example:

I made one small modification that I think will be crucial to summer comfort: instead of threading the entire leg with ribbon that doesn't give, I sewed two lengths of ribbon to either end of a short piece of elastic and then threaded that through my channel. The elastic provides some give room and doesn't sacrifice any of the ruffle. There are loads of great pictures of finished bloomers in their flickr group. Meredith is going to be teaching a lickety-split one afternoon class on making these super cute bloomers down at MD next month. If you're at all nervous about sewing something like this for yourself, TAKE THIS CLASS. You won't be sorry.

This weekend's project comes from Miss April. She's got a baby quilt top pieced using Kate Spain's Central Park (pictured above) and an enlarged version of Malka Dubrawsky's Tree Improv Placemats pattern. We have one fat pack of the entire line left in stock! In her words:

I wanted to use all fabrics from the same line to keep it simple and so I didn't need to think too hard about it, including the process itself. The pattern is so loose but gets great results even in a larger format. This came together in no time at all, and the process was very freeing-- more fun than tedious. I could see this working with all kinds of lines, for example, Moda's Hullabaloo or any number of prints from the Kaffe Fasset Collective.

The yardage for a baby quilt is as follows:
- 1.25 yards of the main animal print
- 1.25 yards of a solid, .33yds of the cobblestone in two colors
- .67 yards of two hernshead plant patterns (because it was directional and I wanted all the lines to go the same way).
All the fabric gets used, with the scraps going together to form a pieced back. The finished measurements are around 50"by 60".
This is, perhaps, the easiest weekend project on the books.
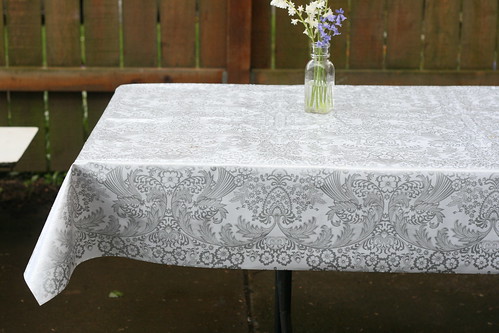
And here to help you, is a restocked bin of oilcloth:

How-To:
- Measure your table
- Cut the correct yardage
- Dress table
You can, of course, make it a little trickier-- since our table stays out all season, I will probably fold and staple the corners of the oilcloth to the wood so it stays put. It wipes down like a dream and I will end up throwing fresh linens on top for dinners outside.
***
- The Crafty Wonderland Collosal Spring Sale is happening today until 6pm.
- Stop by Modern Domestic this weekend and lend a hand with finishing quilts for Quilts for Quake Survivors.
- May 10th, PNCA is hosting Craft Conversation: Making the Past Fashion Forward, held at the Museum of Contemporary Craft.
--Melissa
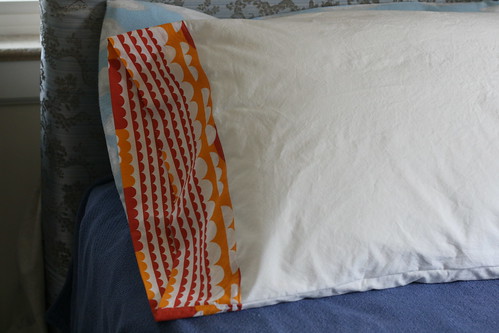
I was able to work behind the counter during the sale weekend and it was really inspiring to learn what people were planning with their purchases. There were a good number of pillowcases on people's minds, which got me thinking about my own, neglected pillows and the organic, cotton sheeting from Robert Kaufman. In fact, this is a great project for all of our organics (many of which are on our sale rack, by the way). Our sheeting is 57" inches wide and comes in white and natural (on order and in soon). It's price point is very reasonable and while soft, it will soften further the more I wash it. With as little as 5/8 yard you can redress your pillow in a crisp, new case.
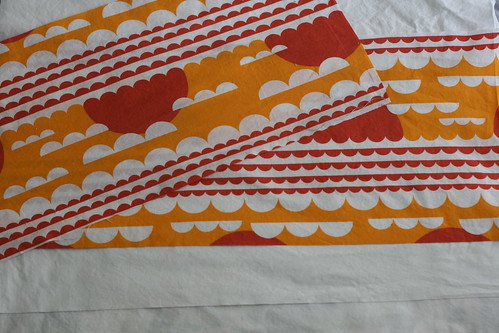
For this project, cut one length of sheeting 20" wide and two strips of printed fabric 20" by 9". Adjust these measurements to fit your own pillows. Mine are standard sized. I used a Dan Stiles print (from organic company Birch) for my print. Attach the print to the short ends of the sheeting, press the seam allowance towards the print, then fold the entire piece in half (short ends and right sides together) and stitch up both edges. This is a great time to practice french seams if you are so inclined.

To hem your pillows, fold and press the raw edge of the case 1/4". Then, with wrong sides together, fold again halving your printed edge and bringing the edge of the fabric just to your previous stitching line. Pin and press. Topstitch close to your previous stitching line, making sure to sew through all the layers and to remove pins as you go.
For two pillowcases I needed 1 1/4 yard of sheeting and half a yard of print. I got enough for four, though, because I just couldn't resist the tree print, also from Birch.
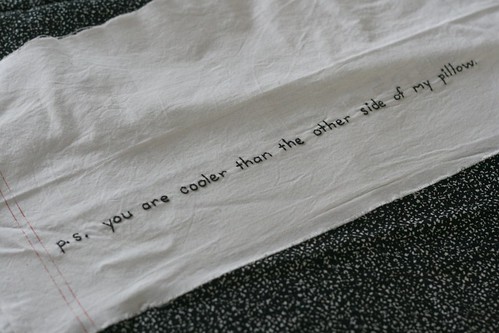
Amy brought in the start of these super cool pillowcases that she's putting together using a classic notebook cover print for the main case and an embroidered edge piece for the hem. These make FANTASTIC gifts-- switch up the fabric and you have presents to cover birthday parties, wedding showers and hostess gifts.
--Melissa
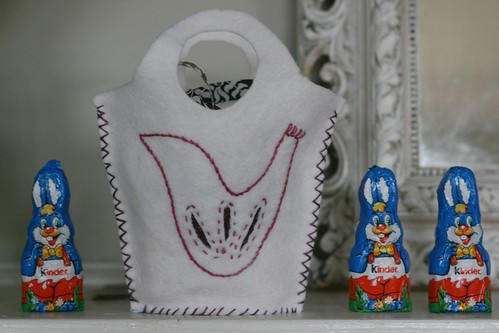
Thank you for another fantastic sale weekend! The store is almost all put back together complete with a nice selection of sale fabric. I'm working on some Easter/spring related crafts considering we're half way through April and Spring might finally be showing up! I've talked about Scandinavian Needlecraft by Clare Youngs before, and couldn't help but pull it out to make some baskets for this weekend's chocolate bunny hunt.
This is a low tech project, requiring only felt, embroidery thread, and basic sewing tools. The pattern calls for enlarging the template by 200 or more percent, but I opted to make a mini version using the pattern at scale. After I cut out the basket, I used a water soluble pen to sketch my design and embroidery thread to stitch it all together. Bolt carries craft felt, small sheets of 100% wool felt, and a wool rayon blend. I used the latter. It has a lovely hand and it is thick and durable. Lots of folks come in to the store looking for larger quantities of 100% wool and industrial wool felt. Both of these items tend to be incredibly cost prohibitive for a store our size to carry. While the wool blend might not be what you're looking for, it is lovely to work with and I encourage folks to give it a try.
This is a fast project, and it's a good thing-- once the sun comes out here in Portland, it gets harder to stay indoors! Thank goodness for chilly evenings and quick crafting.

--Melissa
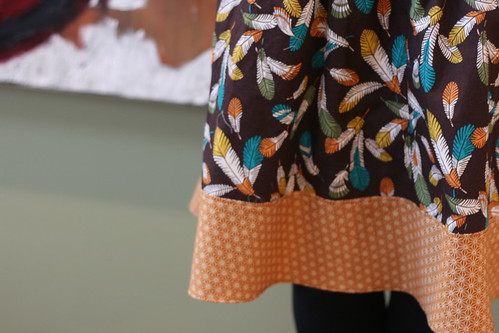
It is pouring rain here today, which means it's a perfect day to get cozy with the sewing machine and scheme up some Spring apparel. April just did that on our retreat to Astoria. In just a few hours she cut and sewed her version of the Belle Skirt from Favorite Things. This is a great project for those of you still gaining confidence in sewing for yourself-- there are no zippers or buttons and the style is flattering for loads of body types. It's a great pattern for using some of the gorgeous, floral, quilt weight cottons we are getting in.
A couple of tips:
*When deciding on your size, pay attention to whether a pattern is listing "finished measurements" (like the Proper Attire Skirt) or if it is listing "body measurements". In this case, you're looking for body measurements. This is a skirt that sits low. Don't be tempted to measure around where you want it to sit for your waist. Your "waist" measurement is always going to be around the bottom of your rib cage-- typically the smallest part of your torso. The hip measurement should be taken around the fullest part of your hips.
*If you are smaller in stature, you might consider decreasing the width of the waistband instead of shortening the skirt during hemming. Measure the width of the waist band pattern piece (taking into account the channel for the elastic) and compare it where it will hit you above and below your hip. Taking 1-3" away in the width will result in a more flattering fit.
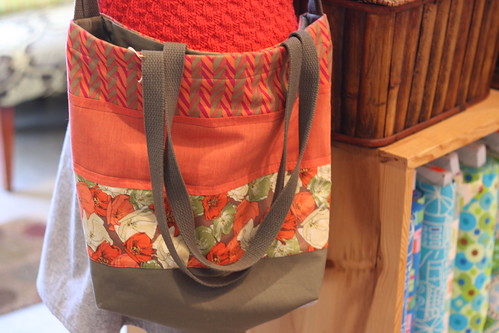
This skirt along with a dual strap Market Bag from Paradiso Designs are some of the new samples we have on display at the shop!